Author Archives: deondre

quinceañera order of events pdf

A Quinceañera is a vibrant celebration marking a girl’s transition to womanhood‚ deeply rooted in Latin American culture. This joyous event honors heritage through rituals‚ dances‚ and attire‚ requiring meticulous planning to ensure a seamless and memorable experience for all involved.

Cultural Significance of Quinceañera

The Quinceañera holds profound cultural and symbolic meaning‚ celebrating a girl’s transition to womanhood while honoring Latin American heritage. It reflects values of family‚ faith‚ and tradition‚ with rituals like the Mass and doll exchange symbolizing growth and responsibility. The celebration emphasizes unity‚ as loved ones gather to support the young woman’s journey. This tradition is a vibrant expression of cultural identity‚ preserving customs while inspiring new generations to cherish their roots.

Overview of the Celebration Structure

A Quinceañera celebration is a beautifully structured event blending tradition and joy. It typically begins with morning preparations‚ followed by a religious ceremony‚ and transitions into a festive reception. The celebration includes key rituals like the Mass‚ the father-daughter dance‚ and the cake cutting‚ all symbolizing growth and new responsibilities. The structure ensures a smooth flow of events‚ honoring cultural traditions while creating lasting memories for the Quinceañera and her family.

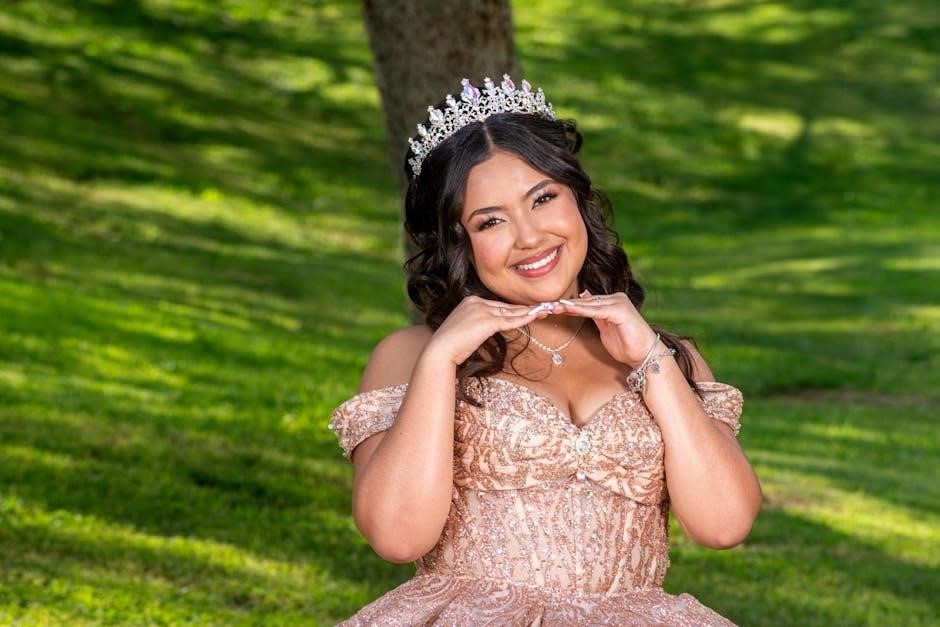
Morning Preparations

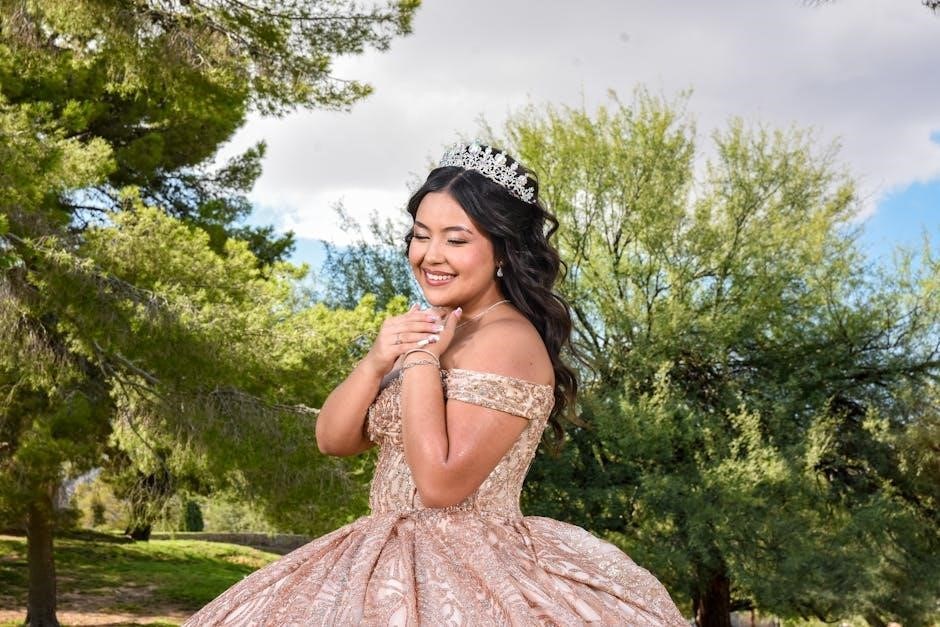
The day begins with the Quinceañera preparing for her celebration‚ including hair styling‚ makeup‚ and dressing in her elaborate gown. These rituals mark her transformation.

Hair and Makeup

The Quinceañera’s morning begins with professional hair styling and makeup application. Stylists create elegant up-dos‚ braids‚ or loose waves‚ while makeup enhances her natural beauty.
This step is crucial for her transformation‚ ensuring she feels confident and radiant for photos and the celebration ahead.

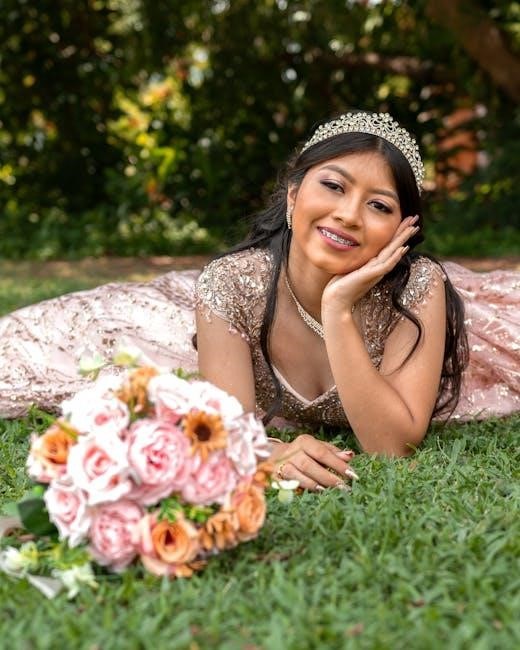
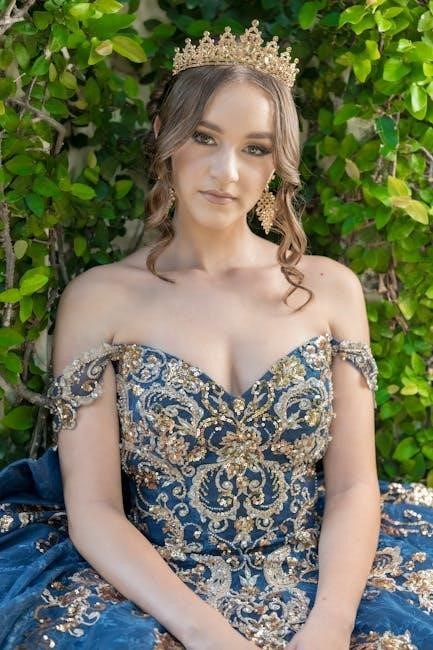
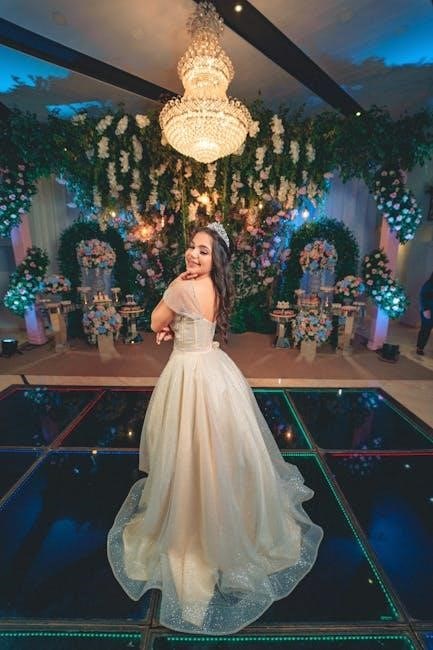
Dressing the Quinceañera

The Quinceañera’s dress is a central element of the celebration‚ symbolizing her transition to womanhood. Traditionally‚ she wears a formal‚ elegant gown‚ often in pastel shades or white‚ reflecting purity and maturity. The dress is carefully chosen to match her style and the event’s theme‚ with intricate details like embroidery or sparkles adding to its grandeur.

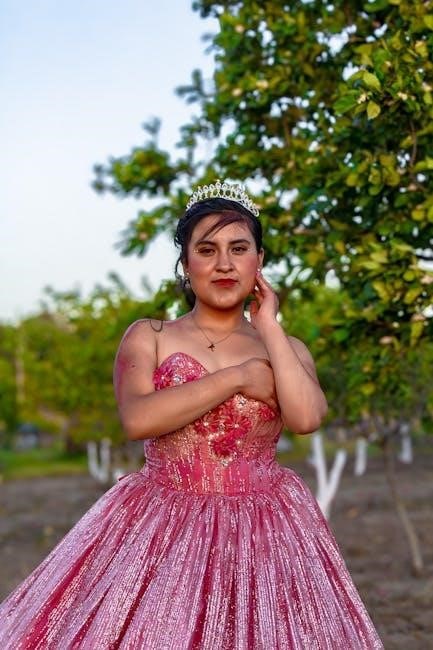
Family members or close relatives assist her in dressing‚ ensuring every accessory‚ from shoes to jewelry‚ complements her look. This moment is a heartfelt ritual‚ preparing her to embody the grace and beauty expected of a young woman.

Ceremony

The ceremony is a sacred and meaningful part of the Quinceañera celebration‚ typically held in a church. It includes a religious service‚ blessings‚ and prayers‚ marking her spiritual transition.

Church Service

The church service is a significant event where the Quinceañera and her family gather for a religious ceremony. The service typically includes a Mass‚ prayers‚ and a blessing‚ led by a priest. The Quinceañera enters the church accompanied by her parents and court of honor‚ symbolizing her faith and spiritual growth. The ceremony emphasizes her commitment to her beliefs and marks a pivotal moment in her transition to womanhood‚ surrounded by loved ones and religious traditions.

Blessing and Prayer

The blessing and prayer are intimate moments during the Quinceañera ceremony‚ led by a priest to seek divine guidance. The Quinceañera kneels‚ often with her father‚ to receive a special blessing‚ symbolizing spiritual growth. The court of honor joins in prayer‚ expressing gratitude and asking for wisdom. This sacred ritual emphasizes faith and marks her transition to adulthood‚ surrounded by loved ones and spiritual reflection‚ deepening her connection to heritage and values.

Transition to the Party

Following the ceremony‚ the Quinceañera and her court transition to the celebration venue‚ marking the official start of the festive party with music and joyful anticipation.

Grand Entrance

The grand entrance is a captivating moment where the Quinceañera‚ escorted by her court of honor‚ enters the reception. This elaborately choreographed entrance often features music‚ applause‚ and photos‚ setting the tone for the celebration. The Quinceañera’s elegant dress and confident presence make this a memorable highlight‚ officially welcoming guests to the party and marking the transition from ceremony to festivities.

Welcome Speech

The welcome speech‚ typically delivered by the Quinceañera’s father or godparent‚ officially greets guests and expresses gratitude for their presence. This heartfelt address often includes reflections on the Quinceañera’s growth‚ the significance of the celebration‚ and well-wishes for her future. It sets a positive tone for the party‚ inviting everyone to embrace the joy and traditions of the occasion‚ ensuring all feel welcome and ready to celebrate this important milestone.

Reception

The reception is a lively celebration where guests gather to enjoy food‚ music‚ and dancing‚ marking the Quinceañera’s transition with joy and shared tradition;

First Dance (Father-Daughter Dance)

The father-daughter dance is a heartfelt tradition‚ symbolizing the Quinceañera’s transition from childhood to womanhood. It typically begins with a waltz‚ showcasing elegance and emotional bonding. This moment honors the father’s role in her life‚ often accompanied by tears of joy. The dance is carefully planned‚ with a meaningful song selected to reflect their relationship. It is a poignant highlight of the celebration‚ capturing the essence of love and tradition in a memorable way for all attendees.

Cake Cutting

The cake cutting ceremony is a sweet and symbolic moment in the Quinceañera celebration. The elaborately decorated cake‚ often tiered and adorned with flowers or butterflies‚ signifies the Quinceañera’s transition to womanhood. Traditionally‚ the Quinceañera cuts the cake with assistance from her father or a guest of honor. This act represents her growing independence and readiness for new responsibilities. Guests then enjoy the cake as a sweet reminder of the joyous occasion‚ marking another memorable milestone in the celebration.

Speeches and Toasts

Speeches and toasts are heartfelt moments where family and friends celebrate the Quinceañera. The young woman often shares her gratitude and reflections‚ while parents and godparents express pride and blessings. Guests may also offer heartfelt words‚ highlighting her growth and future aspirations. Toasts typically follow‚ raising glasses to honor her transition into womanhood. These moments are filled with emotion‚ laughter‚ and joy‚ creating lasting memories for everyone involved in the celebration.

Party

The party transitions into a lively celebration with music‚ dancing‚ and joy‚ marking the Quinceañera’s official entrance into womanhood‚ creating unforgettable memories for all attendees.

Music and Dancing

Music and dancing are central to the Quinceañera celebration‚ setting the tone for joy and festivity. Traditional dances‚ such as the waltz‚ are often performed first‚ followed by modern hits to engage guests. The Quinceañera and her court dance together‚ showcasing choreographed routines. The celebration typically includes a father-daughter dance‚ symbolizing their bond. Guests join in‚ creating a lively atmosphere filled with laughter and energy. The music selection reflects both cultural heritage and contemporary tastes‚ ensuring a memorable experience for everyone involved.

Special Dances (e;g.‚ Waltz)

The Quinceañera often features special dances‚ such as the traditional waltz‚ which holds cultural and symbolic significance. The father-daughter dance is a heartfelt moment‚ while the Quinceañera may also dance with her escort or court. These dances are typically choreographed in advance and reflect the celebration’s elegance. Traditional dances‚ like the Jarabe Tapatio‚ may also be included‚ blending heritage with modern styles. The music and choreography are carefully selected to create lasting memories of this meaningful occasion.

Creating a Quinceañera Order of Events PDF

Creating a Quinceañera order of events PDF ensures a seamless celebration. It helps in organizing timelines‚ key moments‚ and coordination‚ making the event memorable and well-planned.

Designing the Timeline

Designing a detailed timeline is crucial for a smooth Quinceañera celebration. It outlines the flow of events‚ from morning preparations to the final dance. Include key moments like the ceremony‚ speeches‚ and cake cutting. A timeline ensures all activities transition seamlessly‚ keeping guests engaged. Share it with vendors and participants to align expectations. A well-planned timeline helps avoid delays and ensures the celebration unfolds as envisioned‚ creating lasting memories for everyone involved.

Including Key Moments

Including key moments in your Quinceañera order of events PDF ensures every significant tradition is highlighted. Essential elements include the father-daughter dance‚ cake cutting‚ and speeches. These moments symbolize transitions and gratitude. Also‚ incorporate special dances‚ such as the waltz‚ and the grand entrance to capture the celebration’s essence. Highlighting these moments helps guests anticipate and appreciate the cultural significance of each ritual‚ making the event unforgettable and deeply meaningful for everyone involved.

A Quinceañera is a meaningful celebration of womanhood‚ blending cultural traditions with heartfelt moments‚ creating lasting memories. Proper planning ensures every detail reflects her journey and heritage.

Final Thoughts

A Quinceañera is a celebration of growth‚ culture‚ and family‚ marking a girl’s transition to womanhood. Each event‚ from the ceremony to the reception‚ holds deep significance‚ reflecting heritage and joy. Proper planning ensures a seamless experience‚ allowing everyone to focus on creating lasting memories. The first dance‚ speeches‚ and traditions weave together to honor her journey. This milestone is not just a party but a meaningful rite of passage‚ celebrated with love and pride‚ leaving a lasting impression on all involved.

Importance of Planning

Planning is essential for a successful Quinceañera‚ ensuring every detail aligns seamlessly. A well-structured timeline helps coordinate vendors‚ guests‚ and activities‚ preventing last-minute chaos. Proper planning allows the quinceañera to enjoy her special day stress-free‚ knowing everything is organized. It also ensures meaningful traditions are included and honored‚ creating a memorable experience for all. A detailed order of events PDF guides everyone involved‚ making the celebration smooth and joyful‚ while preserving cultural heritage and personal touches.

ksgg700ess manual

Product Overview

The KitchenAid KSGG700ESS is a 30-inch slide-in gas range featuring a 5-burner cooktop, Even-Heat True Convection, and a 5.8 cu. ft. oven capacity. It includes a steam rack, storage drawer, and glass touch controls for enhanced cooking convenience.

1.1 Key Features and Specifications

The KitchenAid KSGG700ESS features a 5-burner gas cooktop with a power range of 5,000 to 17,000 BTU, allowing precise control for various cooking tasks. It includes Even-Heat True Convection for consistent baking and roasting results, with a unique bow-tie design and convection fan; The oven capacity is 5.8 cu. ft., providing ample space for large dishes. The range also includes a steam rack, a storage drawer, and glass touch controls for easy operation. Continuous interlocking grates on the cooktop offer durability and convenience. The range is designed as a slide-in model, ensuring a seamless fit with your kitchen countertops. These features make it a versatile and efficient cooking solution for home chefs.

1.2 Design and Build Quality

The KitchenAid KSGG700ESS showcases a sleek and durable design with a stainless steel construction, offering both longevity and a professional aesthetic. The cooktop features continuous interlocking grates, ensuring easy movement of heavy cookware and a sturdy cooking surface. The glass touch controls provide a modern and intuitive interface, while the overall build ensures a seamless integration into kitchen countertops. The range’s design emphasizes functionality, with a focus on even heat distribution and user-friendly operation. Its solid construction and high-quality materials make it a reliable choice for everyday cooking, while its streamlined appearance enhances any kitchen decor.

Safety Precautions

Always follow safety guidelines to avoid accidents. Ensure racks are level, avoid positioning racks with bakeware, and use the correct LP gas configuration as specified.

2.1 General Safety Tips

Always ensure racks are level and avoid positioning them with bakeware during oven operation. Follow proper LP gas configuration for safe functionality. Read the manual thoroughly and adhere to all guidelines to prevent accidents. Regularly inspect gas lines for leaks and ensure proper ventilation during cooking. Never leave cooking unattended, especially when using high flames or convection settings. Keep children away from the range while in operation. Use oven mitts or tongs to handle hot racks or bakeware. Avoid using abrasive cleaners that could damage surfaces. Store flammable materials away from the range. Ensure the oven is cool before cleaning or performing maintenance. Familiarize yourself with safety features and emergency shutdown procedures.

2.2 Specific Warnings and Cautions

Ensure the gas pressure regulator cap is correctly oriented with the hollow end facing out to prevent gas leaks or improper function. Avoid using abrasive cleaners on burner caps, as this may damage their finish. Do not position racks with bakeware on them, as this can lead to uneven heating or accidents. If the oven fails to ignite, turn off the burner and wait for five minutes before retrying. Never use the oven or cooktop near flammable materials. Ensure the gas supply is turned off during maintenance. If you notice any unusual odors or sounds, immediately stop usage and contact customer support. Always verify the LP gas configuration matches your setup to avoid operational issues.

Installation and Setup

Ensure the gas pressure regulator cap is installed with the hollow end facing out for proper gas flow. Position racks level and without bakeware pre-installed. Verify LP gas configuration matches your setup before initial use. Refer to the manual for detailed installation steps and safety guidelines to ensure correct setup and functionality.

3.1 Installation Requirements

Proper installation of the KitchenAid KSGG700ESS requires a suitable location with adequate ventilation. Ensure a 30-inch wide opening and sufficient clearance around the range for safe operation. The gas supply line must be compatible with the regulator, and the electrical connections should meet local codes. Verify the gas type (natural or LP) matches your setup. Level the range using adjustable feet to ensure even cooking performance. Position racks without bakeware pre-installed and secure all connections. Follow the manual’s guidelines for gas pressure regulator configuration, ensuring the hollow end faces outward for correct gas flow. Consult a professional if unsure about any step.

3.2 Initial Setup and Configuration

After installation, configure your KitchenAid KSGG700ESS by setting the clock and reviewing oven and burner settings. Refer to the manual for specific instructions tailored to your model. Ensure the gas pressure regulator is correctly configured, with the hollow end facing outward for proper gas flow. For LP gas, adjust the regulator as outlined in the manual. Familiarize yourself with the control panel, including the glass touch controls and Sabbath mode settings. Test all burners and the oven to ensure proper ignition and function. For convection cooking, use the EasyConvect feature for precise temperature conversion. Always follow the manual’s guidelines for initial setup to optimize performance and safety.

Operating the Range

Operate the cooktop by turning knobs to desired flame heights. Use the convection oven for even heating, and employ the EasyConvect feature for precise temperature adjustments during baking.

4.1 Cooktop Operation

To operate the cooktop, turn the burner knobs to achieve the desired flame height. The range features five burners with varying BTU outputs, from 5,000 to 17,000, allowing precise control for different cooking tasks. Ignition is electronic, ensuring a reliable flame; For optimal performance, always use the burner caps provided, as they help distribute heat evenly and protect the burners from spills. When cooking, ensure pans are properly sized for the burners to maintain efficiency. The continuous interlocking grates allow easy movement of heavy cookware across the surface. Always monitor the flame and adjust as needed to avoid excessive heat or low simmer. Keep the burner caps clean to ensure proper flame distribution.

4.2 Oven Operation

The KitchenAid KSGG700ESS oven features Even-Heat True Convection, ensuring consistent cooking results. Preheat the oven using the glass touch controls, selecting modes like Bake, Roast, or Convection. The unique bow-tie design and convection fan circulate air evenly, reducing hot spots. For roasting, both upper and lower elements operate, while baking uses only the lower element. The oven also includes a Sabbath mode for observance needs. Always preheat for at least 10 minutes before cooking. Use the steam rack for enhanced moisture in dishes. Avoid overcrowding racks for optimal airflow. Refer to the manual for specific temperature settings and cooking times for various dishes. Clean spills promptly to maintain oven performance and prevent damage to the interior surfaces.

Maintenance and Troubleshooting

Regularly clean racks and burners to maintain performance. Check igniter function and ensure proper gas flow. Refer to the manual for troubleshooting common issues like ignition problems or uneven heating.

5.1 Cleaning and Maintenance Tips

Regular maintenance ensures optimal performance of your KitchenAid KSGG700ESS range. Clean racks and burners after each use to prevent food residue buildup. Use a gentle cleanser and avoid abrasive materials that may scratch surfaces. Wipe down the cooktop and knobs frequently. For the oven, use the self-cleaning feature or manually clean with a soft brush and mild detergent. Check and clean the igniter to ensure proper gas flow and ignition. For tough stains, mix baking soda and water to create a paste, apply it, and let it sit before scrubbing. Refer to the manual for specific cleaning instructions for the steam rack and storage drawer. Regularly inspect and clean the venting system to maintain proper airflow. Always unplug the range before performing any deep cleaning. Cleaning the exterior glass with a glass cleaner ensures a polished look. For persistent stains or grime, soak parts in warm soapy water before scrubbing. Ensure all components are dry before reconnecting power. By following these tips, you can maintain your range’s efficiency and longevity. Always refer to the manual for model-specific cleaning recommendations. If unsure, consult the KitchenAid support team for guidance.

5.2 Common Issues and Solutions

Common issues with the KitchenAid KSGG700ESS include oven ignition problems and uneven heating. If the oven fails to ignite, check the igniter for cleanliness and ensure the gas supply is turned on. For uneven heating, verify that the racks are properly positioned and the convection fan is functioning. If the bottom element is not heating, ensure the oven is in the correct mode (bake or roast). For persistent issues, reset the range by unplugging it for 30 seconds. If problems persist, contact KitchenAid customer support or refer to the manual for troubleshooting guides. Regular cleaning of burners and igniters can prevent many common issues. Always ensure proper installation and maintenance for optimal performance.

Warranty and Support

KitchenAid offers a comprehensive warranty covering parts and labor for defective components. Customers can access live chat, phone support, or online resources for assistance and troubleshooting.

6.1 Warranty Details

The KitchenAid KSGG700ESS is backed by a limited 1-year warranty covering parts and labor for defects in materials and workmanship. Certain components, such as gas burners, may have extended coverage up to 5 years. The warranty is non-transferable and applies to the original purchaser only. Registration is required to activate the warranty, and proof of purchase is necessary for claims. Damage caused by misuse, neglect, or improper installation is excluded. For full warranty terms, refer to the manual or visit KitchenAid’s official website. Customers can also contact KitchenAid’s customer service for warranty-related inquiries and support.

6.2 Customer Support Resources

KitchenAid offers comprehensive customer support resources for the KSGG700ESS model. Users can access live chat, email, or phone support (1-800-422-1230) for assistance with installation, operation, or troubleshooting. The official KitchenAid website provides detailed product manuals, troubleshooting guides, and FAQs. Additionally, the “Product Help” section on their website offers model-specific information, including user guides and maintenance tips. Customers can also register their appliance online to ensure warranty coverage and receive personalized support. For urgent issues, KitchenAid recommends contacting their customer service team directly for prompt resolution. Online resources are available 24/7, while live support operates during standard business hours.

green brook electrical timer manual

Green Brook electrical timers are essential devices for automating electrical systems‚ offering programmable scheduling for lighting‚ heating‚ and appliances. Models like T108A-C and T205-C provide advanced features such as battery backup for memory retention during power failures and customizable on/off settings. These timers enhance energy efficiency and convenience in residential and commercial settings‚ ensuring precise control over electrical operations.

1.1 Overview of Green Brook Timer Models

Green Brook offers a range of timer models‚ including the T108A-C (7-day electronic socket box timer)‚ T205-C (7-day fused timer spur switch)‚ and T105A-C (electronic socket box timer). These models provide flexible scheduling options‚ with features like battery backup‚ countdown functionality‚ and compatibility with various electrical systems. Each model is designed to meet specific needs‚ ensuring precise control over appliances and lighting for energy efficiency and convenience.

1.2 Importance of Timers in Electrical Systems

Green Brook electrical timers play a crucial role in optimizing energy usage and reducing costs. By automating on/off schedules‚ they enhance convenience and safety‚ preventing overheating and electrical hazards. Ideal for lighting‚ heating‚ and appliances‚ these timers modernize electrical systems‚ ensuring efficient operation and integration with daily routines.

Safety Considerations for Installation

Ensure the timer is mounted on a non-flammable surface and maintain at least 300mm of air space around it. Always tighten terminal screws fully to prevent electrical hazards.

2.1 General Safety Precautions

Always install timers on non-flammable surfaces and ensure a 300mm air space around the device. Avoid overloading circuits and verify mains voltage matches the timer’s rating. Properly connect live and neutral wires to terminals 1 and 2‚ respectively. Tighten terminal screws securely to prevent electrical hazards. Follow IET wiring regulations and consult a qualified electrician if unsure. Never mount timers near combustible materials or bedding.

2.2 Mounting and Air Space Requirements

Mount the timer on a non-flammable surface‚ ensuring at least 300mm of clear air space around it. Avoid installing near combustible materials like bedding or towels. Secure the backplate to the wall box using 3.5mm screws. Do not mount on surfaces prone to moisture or extreme temperatures. Proper mounting ensures safe operation and prevents overheating‚ adhering to safety standards and manufacturer guidelines.

Installation Steps for Green Brook Timers

Mount the timer securely‚ ensuring terminals are fully tightened. Connect wiring according to the manual‚ following safety regulations. Consult a qualified electrician if unsure to ensure proper installation.

3.1 Wiring Instructions for Different Models

Wiring varies by model‚ with specific terminals for live and neutral connections. For the T108A-C‚ connect live to terminal 1 and neutral to terminal 2. The T205-C requires wiring to the fused spur switch‚ ensuring all connections are secure and terminals are tightened properly. Always follow the manual for model-specific instructions and avoid overloading circuits. Consult a qualified electrician if unsure to ensure safe and correct installation.

3.2 Terminal Connections and Tightening

Proper terminal connections are crucial for safe and reliable operation. Use a screwdriver to secure wires to the correct terminals‚ ensuring they are tightly fastened. For models like T108A-C and T205-C‚ live and neutral wires must be connected to the designated terminals. Avoid overloading by adhering to the timer’s load capacity. Always consult the manual or a qualified electrician if unsure‚ as improper connections can lead to malfunctions or safety hazards.

Programming and Operating the Timer

Program schedules with ease by setting the day‚ time‚ and on/off cycles. Use the buttons to customize settings and ensure smooth operation of connected devices.

4.1 Setting the Day of the Week and Time

Press the TIME button for 2 seconds to enter time-setting mode. Use the navigation buttons to adjust the hour and minute. Save settings by pressing the TIME button again. The timer operates in 24-hour format‚ ensuring accurate scheduling. Properly setting the day and time is crucial for reliable operation of programmed schedules.

4.2 Programming On/Off Schedules

Press the PROG button to enter programming mode. Use the navigation buttons to select the desired day and time for the on/off events. Set the start and end times for each event using the SET button. Repeat for additional events. Ensure all schedules are saved by pressing the PROG button again. The timer allows multiple on/off settings‚ providing flexibility for customized automation.

Troubleshooting Common Issues

Common issues include incorrect time settings or failed on/off schedules. Reset the timer using the recessed Reset button or refer to the manual for specific solutions.

5.1 Resetting the Timer to Default Settings

To reset the timer‚ press the recessed Reset button with an insulated blunt probe. Hold the “-” and “Set” buttons simultaneously for 10 seconds. This restores factory settings‚ ensuring proper operation. After resetting‚ reprogram the timer‚ including the day‚ time‚ and schedules. Ensure the battery is correctly installed to maintain memory during power outages. Resetting is ideal for resolving programming or power-related issues.

5.2 Addressing Battery Backup and Power Failures

The Green Brook timer uses a standard AAA battery for backup‚ providing up to 150 hours of memory retention during power failures. If the battery is low‚ replace it immediately to avoid losing programmed settings. During power outages‚ the timer’s memory remains intact‚ ensuring schedules resume once power is restored. Regularly check battery life to prevent data loss and maintain reliable operation of your timer.

Green Brook T108A-C: 7 Day Electronic Socket Box Timer

The T108A-C is a versatile 7-day electronic timer with battery backup‚ offering precise control over electrical devices. It supports customizable on/off schedules‚ enhancing energy efficiency and convenience for lighting and heating systems.

6.1 Features and Benefits

The Green Brook T108A-C offers a 7-day programming schedule‚ battery backup for memory retention‚ and customizable on/off settings. It supports energy efficiency‚ precise control over appliances‚ and easy installation. The timer is designed for versatility‚ accommodating various electrical devices while ensuring reliability and user-friendly operation.

6.2 Step-by-Step Setup Guide

First‚ install the timer on a non-flammable surface with at least 300mm of air space around it. Connect the wires to the correct terminals‚ ensuring secure tightening. Insert the AAA battery for memory backup. Press the TIME button to set the current day and hour. Program your desired on/off schedules using the PROG button. Save settings and test functionality. This ensures reliable automation and energy efficiency.

Green Brook T205-C: 7 Day Fused Timer Spur Switch

The Green Brook T205-C is a 7 Day Fused Timer Spur Switch designed to control electrical devices with precise scheduling. It features a countdown function for custom on/off cycles‚ ensuring efficient energy management and convenience.

7.1 Installation Instructions

Install the Green Brook T205-C by ensuring proper wiring connections‚ adhering to local electrical regulations. Mount the timer on a non-flammable surface with at least 300mm of clear space around it. Secure the device firmly using suitable screws. Connect live and neutral wires to the designated terminals‚ ensuring all connections are tight. Consult a qualified electrician if unsure‚ and follow the provided manual for precise wiring diagrams and safety guidelines.

7.2 Programming the Countdown Feature

Press and hold the PROG and SET buttons to activate the countdown feature. Use the + or ⏤ buttons to select the desired duration‚ ranging from 1 minute to 100 hours. Press SET to confirm. The timer will count down and automatically turn off at the set time; For adjustments‚ repeat the process. The countdown feature ensures precise control over appliance operation‚ enhancing flexibility and energy management.

Green Brook T105A-C: Electronic Socket Box Timer

The Green Brook T105A-C is a 13A electronic socket box timer offering 24 programmable on/off settings. It uses a AAA battery for memory backup and is ideal for controlling lighting‚ heaters‚ and small appliances with precise scheduling.

8.1 Technical Specifications

The Green Brook T105A-C features a 16A load capacity and operates at 230V AC‚ 50Hz. It uses a standard AAA battery for memory backup‚ lasting up to 150 hours. The timer supports 24 on/off settings and requires a 300mm air space for safe mounting. It meets safety ratings for electrical appliances and is backed by a one-year warranty for reliable performance.

8.2 Operating Instructions

Set the day of the week and time by pressing the TIME button for 2 seconds. Program on/off schedules using the PROG button‚ selecting desired times. The timer features a countdown function‚ allowing settings from 1 minute to 100 hours. Reset by pressing the recessed Reset button with a blunt probe. Ensure terminal screws are tightened for secure connections‚ and refer to the manual for detailed programming instructions and troubleshooting tips.

Technical Specifications and Compatibility

Green Brook timers operate at standard voltage and frequency‚ supporting up to 16A load capacity. They are compatible with various electrical systems and ensure safe‚ efficient operation.

9.1 Voltage and Frequency Requirements

Green Brook timers are designed to operate at standard household voltage‚ typically 230V AC‚ with a frequency of 50Hz. Before installation‚ ensure the mains voltage matches the timer’s rating plate specifications. This ensures safe and reliable operation‚ preventing damage to the device or connected appliances. Always check the compatibility to avoid electrical issues and maintain efficiency.

9.2 Load Capacity and Safety Ratings

Green Brook timers are designed with specific load capacities to ensure safe operation. Models like the T108A-C and T205-C support up to 13A or 16A loads‚ suitable for most household appliances. Always adhere to the maximum rated load to prevent overheating or damage. These timers meet safety standards‚ protecting against overloads and ensuring reliable performance. Regularly verify the connected load to maintain safety and efficiency.

Manufacturer Support and Resources

Green Brook offers a one-year guarantee for their timers‚ ensuring reliability and performance. Manuals‚ online support‚ and resources are available at www.greenbrook.co.uk for troubleshooting and guidance.

10.1 Warranty and Guarantee Information

Your Green Brook timer is backed by a one-year guarantee from the date of purchase‚ covering manufacturing defects. This warranty applies to models like the 7 Day Electronic Timer and Fused Timer Spur Switch. The guarantee does not affect your statutory rights. Keep your purchase receipt as proof of ownership. For warranty claims or inquiries‚ contact Green Brook customer support through their official website or provided contact details.

10.2 Accessing Manuals and Online Support

Green Brook provides comprehensive online support‚ including downloadable PDF manuals for models like T105A-C and T205-C. Visit their official website at www.greenbrook.co.uk to access these resources. Additionally‚ instructional videos and FAQs are available to guide you through installation and operation. For further assistance‚ contact their customer support team via the website or consult local electrical suppliers for personalized help.

neurotech foot massager manual pdf download

Welcome to the comprehensive guide for the NeuroTech Foot Massager. This manual provides detailed instructions, features, and benefits to enhance your relaxation experience. Download the PDF now.

1.1 Overview of the NeuroTech Foot Massager

The NeuroTech Foot Massager is a cutting-edge device designed to provide therapeutic relief and relaxation. Using advanced EMS technology, it stimulates muscles and targets pressure points to alleviate pain and discomfort. Its customizable intensity levels and multiple massage modes offer a personalized experience. Ideal for home use, it combines ease of operation with effective results, making it a popular choice for foot care and wellness.

1.2 Importance of the Manual for Users

The manual is essential for understanding and maximizing the benefits of the NeuroTech Foot Massager. It provides step-by-step instructions, safety precautions, and troubleshooting tips. By reading the manual, users can ensure proper usage, avoid potential errors, and maintain the device’s longevity. It serves as a comprehensive guide to unlocking all features and optimizing the massage experience for enhanced comfort and relaxation.

Features and Benefits of the NeuroTech Foot Massager

The NeuroTech Foot Massager features EMS technology, multiple intensity levels, and customizable massage modes. It offers pain relief, relaxation, and improved circulation, enhancing overall well-being.

2.1 Key Features of the Device

The NeuroTech Foot Massager boasts advanced EMS (Electrical Muscle Stimulation) technology, offering multiple intensity levels and customizable massage modes. It features an automatic shut-off function after 15 minutes, ensuring safe and controlled sessions. The device also includes a user-friendly control panel, enabling easy adjustments to intensity and mode selections. Additionally, it provides a soothing experience with gentle vibrations and targeted pressure point stimulation for optimal relaxation and pain relief.

2.2 Health Benefits of Using the Foot Massager

The NeuroTech Foot Massager offers numerous health benefits, including relief from foot pain and neuropathy. It stimulates nerve endings, improving circulation and reducing muscle tension. Regular use can alleviate stress and promote relaxation, while the EMS technology enhances muscle stimulation for therapeutic benefits. This device is ideal for individuals seeking a convenient, effective way to maintain foot health and overall well-being.

Step-by-Step Guide to Using the NeuroTech Foot Massager

This section provides a clear, easy-to-follow guide for operating the NeuroTech Foot Massager, ensuring a safe and effective experience. Discover how to set up, use, and maintain the device.

3.1 Unboxing and Initial Setup

Unboxing your NeuroTech Foot Massager is straightforward. Carefully remove the device, control unit, and power adapter from the packaging. Ensure all components are included and undamaged. Place the massager on a flat surface and plug in the power adapter. Before first use, read the manual to understand safety precautions and operation. Charge the device if necessary, following the instructions provided.

3.2 Operating the Device: Modes and Intensity Settings

To operate the NeuroTech Foot Massager, press the power button to turn it on. Select from multiple massage modes, such as rolling, kneading, or pressing, using the control panel. Adjust the intensity levels, which range from gentle to intense, to suit your preference. Use the “+” and “-” buttons to customize the strength. The device also features an automatic 15-minute shut-off for safety and convenience.

3.3 Safety Precautions and Usage Guidelines

For safe use, read the manual thoroughly before operating the NeuroTech Foot Massager. Keep the device out of reach of children and avoid using it near water. Use the massager for 15 minutes, 1-2 times daily, as recommended. Always unplug the device when not in use to ensure safety and longevity. Follow these guidelines to maximize benefits and prevent potential hazards.

Troubleshooting Common Issues

If the NeuroTech Foot Massager malfunctions, check power connections or restart the device. Refer to the manual for solutions or contact customer support for assistance.

4.1 Identifying and Resolving Technical Problems

If the NeuroTech Foot Massager isn’t functioning, first check the power connection and ensure it’s properly plugged in. Restart the device or refer to the manual for troubleshooting steps. Common issues include faulty intensity settings or electrical malfunctions. Clean the device regularly and avoid overuse. For unresolved problems, consult the manual or contact customer support for professional assistance.

4.2 Maintenance Tips for Longevity

Regularly clean the massager with a soft cloth and mild detergent to prevent dust buildup. Store it in a dry, cool place to avoid damage. Avoid exposing it to extreme temperatures or moisture. Follow the manual’s maintenance schedule and replace worn parts promptly. Proper care ensures optimal performance and extends the device’s lifespan for continued relaxation and wellness benefits.

Customizing Your Massage Experience

The NeuroTech Foot Massager allows users to tailor their experience with adjustable intensity levels and multiple massage modes, ensuring a personalized relaxation and pain relief session.

5.1 Adjusting Intensity Levels

The NeuroTech Foot Massager offers customizable intensity levels, allowing users to tailor their experience. With up to 19 adjustable settings, you can choose the perfect strength for comfort or deep tissue relief. Use the control unit’s buttons to increase or decrease intensity seamlessly. The device also features an automatic shut-off after 15 minutes, ensuring safe and controlled sessions. Adjust according to your preference for optimal relaxation.

5.2 Selecting Different Massage Modes

The NeuroTech Foot Massager features multiple massage modes, including rolling, kneading, and pulsating. Each mode targets different muscle groups, offering a personalized experience. Users can easily switch modes using the control panel. The rolling mode mimics professional techniques, while kneading provides deep relief. Pulsating mode offers a soothing experience. Experiment with modes to find your perfect relaxation routine. Refer to the manual for detailed guidance.

Where to Find the NeuroTech Foot Massager Manual PDF

The manual can be downloaded from the official NeuroTech website or authorized retailers. Use search engines with keywords like “NeuroTech Foot Massager manual PDF” for reliable sources. Always download from trusted sites to ensure safety and accuracy.

6.1 Official Website and Authorized Retailers

The NeuroTech Foot Massager manual is readily available on the official NeuroTech website. Simply navigate to the product page and look for the “Downloads” section. Additionally, authorized retailers often provide direct links to the PDF manual. Ensure you only download from trusted sources to avoid unauthorized versions. This guarantees access to the most accurate and up-to-date information.

6.2 Reliable Online Sources for Download

For a secure and reliable download, visit trusted platforms like ManualsLib or Scribd. These websites offer verified PDF manuals for the NeuroTech Foot Massager. Use specific keywords like “NeuroTech Foot Massager manual PDF” in your search to find authentic sources. Always exercise caution and avoid unfamiliar sites to ensure you download a safe and accurate version of the manual.

Understanding the Manual’s Content

The NeuroTech manual offers detailed instructions for assembly, usage, and troubleshooting. It includes technical specifications, safety guidelines, and warranty info, ensuring comprehensive understanding and safe operation.

7.1 Detailed Instructions for Assembly and Use

The manual provides a step-by-step guide for assembling and operating the NeuroTech Foot Massager. It includes instructions on unboxing, plugging in, and using the control buttons to adjust modes and intensity. Safety guidelines and usage limits are emphasized to ensure optimal performance and user comfort. Clear diagrams and troubleshooting tips are also included for easy reference.

7.2 Technical Specifications and Warranty Information

The manual outlines the technical specifications, including voltage, power consumption, and dimensions. It also details the warranty period and coverage terms. Users can find information on EMS technology and safety certifications. The warranty section explains how to register the device and claim support. This ensures users have clarity on both performance and protection for their NeuroTech Foot Massager.

Frequently Asked Questions (FAQs)

This section addresses common queries about the NeuroTech Foot Massager, including troubleshooting, customization, and usage tips, ensuring users can resolve issues and optimize their experience.

8.1 Common Queries About the Device

Users often ask about the NeuroTech Foot Massager’s intensity levels, session duration, and customization options. They also inquire about troubleshooting common issues like device malfunction or connectivity problems. Additionally, questions about maintenance, such as cleaning and storage, are frequent. The manual addresses these concerns, ensuring users can resolve issues and optimize their experience effectively.

8.2 Clarifications on Usage and Maintenance

The manual clarifies proper usage, emphasizing daily session limits of 15 minutes and adjusting intensity levels for comfort. It also highlights maintenance tips like sanitizing surfaces and storing the device in a dry place. Regular inspection of cables and pads is advised to ensure longevity. Following these guidelines ensures optimal performance and user safety throughout the product’s lifespan.

Comparing NeuroTech Foot Massager with Other Brands

The NeuroTech Foot Massager stands out with its advanced EMS technology and customizable programs, offering superior relief and relaxation compared to other brands on the market.

9.1 Unique Selling Points of NeuroTech

The NeuroTech Foot Massager is a top choice for its innovative EMS technology, customizable massage programs, and user-friendly control panel. It offers 19 adjustable intensity levels and multiple massage modes, ensuring a personalized experience. The device is portable, easy to use, and designed to target specific pressure points for maximum relief. Its advanced features and durability set it apart in the market, providing deep relaxation and pain relief.

9.2 Market Competition and Alternatives

The NeuroTech Foot Massager competes with brands like FineticTech and HoMedics, offering similar features but excelling in EMS technology and customization. While alternatives may lack the same intensity levels or programmable options, NeuroTech stands out for its durability and user-friendly design. The manual is readily available for download, ensuring users can fully utilize its advanced features and maintain their device effectively for long-term use and satisfaction.

User Reviews and Testimonials

Users praise the NeuroTech Foot Massager for its effectiveness and ease of use, with many highlighting the manual’s clarity in guiding them to customize settings and troubleshoot issues.

10.1 Real-Life Experiences with the NeuroTech Foot Massager

Many users have shared their positive experiences with the NeuroTech Foot Massager, emphasizing its effectiveness in relieving foot pain and neuropathy. Several customers mentioned how the device’s customizable intensity settings and multiple massage modes have helped them achieve relaxation and comfort at home. The manual’s clear instructions were also praised for making setup and operation straightforward, even for first-time users. Overall, the feedback highlights the product’s ability to improve daily well-being through consistent use.

10.2 Feedback on the Manual’s Clarity and Usefulness

Users have praised the NeuroTech Foot Massager manual for its clarity and comprehensive guidance. Many highlighted how the detailed instructions made setup and operation intuitive. The troubleshooting section was particularly appreciated for resolving common issues quickly. Overall, the manual is seen as a user-friendly resource that enhances the overall experience of using the foot massager effectively.

Advanced Features of the NeuroTech Foot Massager

The device features advanced EMS technology, customizable programs, and adjustable intensity levels, offering a tailored massage experience for optimal relaxation and pain relief.

11.1 EMS Technology and Its Benefits

The NeuroTech Foot Massager utilizes advanced EMS (Electrical Muscle Stimulation) technology to deliver low-frequency electrical pulses. These pulses target specific pressure points, relieving foot pain, improving circulation, and relaxing tense muscles. The technology is designed to simulate professional massage techniques, offering deep stimulation and therapeutic benefits for enhanced comfort and wellness. Regular use can significantly reduce discomfort and promote overall foot health.

11.2 Customizable Programs for Specific Needs

The NeuroTech Foot Massager offers customizable programs tailored to individual preferences. Users can choose from multiple intensity levels and massage modes to address specific needs, such as relaxation, pain relief, or muscle stimulation. The device also features adjustable settings for duration and pressure, ensuring a personalized experience. This versatility makes it ideal for diverse user requirements, enhancing comfort and therapeutic effectiveness.

The NeuroTech Foot Massager manual is a comprehensive guide to maximizing your device’s potential. Explore its features, benefits, and customization options for a tailored experience. Download now.

12.1 Final Thoughts on the NeuroTech Foot Massager

The NeuroTech Foot Massager is a cutting-edge device designed to alleviate foot pain and neuropathy through advanced EMS technology. Its customizable intensity levels and multiple massage modes ensure a personalized experience. With its user-friendly design and comprehensive manual, this massager is an excellent choice for anyone seeking relief and relaxation. It’s a valuable investment for long-term foot health and wellness.

12.2 Encouragement to Download and Utilize the Manual

Downloading the NeuroTech Foot Massager manual is essential for maximizing your device’s potential. It provides clear instructions, troubleshooting tips, and maintenance advice, ensuring optimal performance. Accessible online, the manual is a valuable resource for understanding features and customizing your massage experience. Don’t hesitate to download it today and make the most of your investment in relaxation and foot care.

rules for gin rummy pdf

Gin Rummy is a popular two-player card game played with a standard 52-card deck. The objective is to form valid sets and runs to score points.

History and Evolution of Gin Rummy

Gin Rummy, a variation of the Rummy family of card games, has a rich history dating back to the early 20th century. Created by Elwood T. Baker in 1909, it was designed to be a faster-paced alternative to traditional Rummy. The game gained popularity in the mid-1900s, becoming a favorite among card players in the United States. Its simplicity and quick gameplay made it accessible to all ages, solidifying its place as a classic. Over time, Gin Rummy evolved into one of the most widely recognized and played card games globally, with its rules and strategies refined to enhance competitive play. Today, it remains a beloved game, enjoyed both casually and in tournaments.

Basic Rules and Objectives of the Game

Gin Rummy is a two-player game using a standard 52-card deck. The goal is to score points by forming valid sets (three or four cards of the same rank) or runs (three or more consecutive cards of the same suit). Players take turns drawing and discarding cards, aiming to be the first to eliminate all their cards. The game ends when a player forms sets and runs that total all 10 cards in their hand, declaring “Gin.” Points are calculated based on the opponent’s unmelded cards, with bonuses awarded for achieving Gin or knocking. Strategy and skill are key to outperforming your opponent and securing victory.

Setup and Initial Play

Gin Rummy is played with a 52-card deck. Each player is dealt 10 cards, and the remaining cards form the draw pile. The top card is discarded, starting play. The youngest player begins first, alternating turns to draw and discard cards, aiming to form valid combinations quickly.

The Deck and Card Rankings

Gin Rummy is played with a standard 52-card deck, excluding jokers. The cards rank from highest to lowest as follows: King, Queen, Jack, 10, 9, 8, 7, 6, 5, 4, 3, 2, and Ace (lowest). Each suit contains 13 cards, and the deck is shuffled thoroughly before each game. Two decks are often used to speed up play, allowing one deck to be shuffled while the other is in use. The Ace is considered low and cannot act as a high card in a run. Face cards (King, Queen, Jack) are worth 10 points each, while numbered cards are worth their face value; This ranking system is crucial for forming valid combinations and calculating scores.

Dealing the Cards

In Gin Rummy, the game begins with a standard 52-card deck. The dealer shuffles the deck and deals 10 cards face-down to each player. The remaining cards are placed face-down in a pile, with the top card turned face-up to start the discard pile. Players must not reveal their cards during the deal. The dealer alternates between hands, and the player to the left of the dealer goes first. The dealing process ensures fairness and randomness, setting the stage for strategic gameplay. Each player’s 10-card hand is the foundation for forming sets and runs to outplay their opponent.

Initial Setup and Gameplay Overview

After dealing, the remaining cards form the draw pile, with the top card turned over as the discard pile’s base. Players alternate turns, drawing a card from the draw pile or picking up the top discard. Each player’s goal is to form sets (three or four cards of the same rank) or runs (three or more sequential cards of the same suit). The game progresses with players drawing and discarding cards strategically. The first player to form sets or runs with all their cards declares “Gin,” winning the round. If a player cannot form valid combinations, they knock, ending the round, and points are scored based on unmelded cards.

Scoring and Winning the Game

Points are scored based on opponents’ unmelded cards. Going Gin awards a 25-point bonus. The first player to reach 100 points wins the game.

How Points Are Calculated

In Gin Rummy, points are calculated based on the value of unmelded cards in a player’s hand at the end of a round. Each card has a specific point value: face cards (King, Queen, Jack) are worth 10 points each, Aces are 1 point, and numbered cards are worth their face value. When a player goes “Gin” or “Knocks,” they score points equal to the total value of their opponent’s unmelded cards. Additionally, a 25-point bonus is awarded for going Gin. If a player wins the game without the opponent scoring any points, they receive a 200-point bonus, otherwise, the winner gets a 100-point bonus. Points are capped at a maximum of 100 per hand.

Winning Conditions and Bonuses

A player wins the game by reaching an agreed-upon score, typically 100 points or more. The game ends when a player forms valid melds with all cards in their hand, achieving “Gin” for a 25-point bonus. If a player “Knocks” (lays down melds and discards one card), they score points based on unmatched cards. The winner receives a 100-point bonus if they win the game. If a player wins before their opponent scores, a 200-point bonus is awarded. Bonuses enhance the winner’s score, making strategic play crucial. Proper scoring ensures fair competition and adheres to Gin Rummy’s rules.

Strategies and Tips

Mastering Gin Rummy requires strategic play, focusing on forming sets and runs quickly. Prioritize discarding unwanted cards and timing your “Knock” or “Gin” for maximum points and bonuses.

Forming Valid Combinations (Sets and Runs)

In Gin Rummy, valid combinations are essential for scoring. A set consists of three or four cards of the same rank, while a run is three or more consecutive cards of the same suit. Players must strategically draw and discard cards to complete these combinations quickly. The game emphasizes forming sets and runs efficiently to outplay opponents. Understanding when to hold onto cards for potential combinations or discard them to prevent opponents from forming their own is crucial. Proper planning and card management are key to mastering these combinations and securing a win.

Knocking and Going Gin

Knocking in Gin Rummy occurs when a player forms valid combinations (sets or runs) that total all 10 or fewer unmatched cards. This action ends the hand, and the player scores points based on the opponent’s unmatched cards. Going Gin is a special case of knocking where a player forms combinations using all 10 cards in their hand. This awards a 20-point bonus in addition to the opponent’s unmatched card points. Knocking is strategic, as it allows players to score points, while going gin demonstrates a perfect hand. Proper timing and decision-making are crucial to maximize scoring potential and outplay opponents effectively.

Advanced Tactics to Outplay Opponents

Mastering advanced tactics in Gin Rummy requires a deep understanding of card probabilities and strategic thinking. One key tactic is card counting, which involves tracking discarded cards to anticipate opponents’ potential moves. Players can also use holding onto high cards strategically, as these are less likely to be matched by opponents. Additionally, forcing a “Gin” by holding back essential cards can disrupt opponents’ plans. Another tactic is misleading opponents by discarding cards that appear unimportant, concealing your own melds. Employing these strategies effectively can significantly improve your chances of winning and outsmarting your opponent in competitive games. Balancing risk and reward is essential for long-term success.

Variations of Gin Rummy

Variations of Gin Rummy

Oklahoma Gin introduces a twist by barring players from knocking unless their unmatched cards total 10 points or less. Other regional variants offer unique rule modifications.

Three-Player Gin Rummy

Three-Player Gin Rummy adapts the classic two-player game for three participants, often using two decks to ensure sufficient cards. Each player receives 7 cards, and the remaining cards form the draw pile. The dealer rotates each round to ensure fairness. The objective remains the same: form valid sets and runs to score points. However, knocking rules may vary slightly, as only one player can knock per round. This variation introduces a dynamic social element, with players needing to strategize against multiple opponents. While less common than the two-player version, three-player Gin Rummy offers a fresh challenge for those familiar with the original game.

Oklahoma Gin and Other Regional Variants

Oklahoma Gin is a notable regional variant of Gin Rummy, featuring unique rules that set it apart from the standard game. In Oklahoma Gin, the value of the upcard determines the minimum number of points a player must have to knock, adding a strategic layer. Other regional variants include differences in scoring systems, deck sizes, and special wild cards. These variations often reflect local gaming cultures and preferences, offering diverse experiences for players. While the core objective remains the same, regional twists keep the game fresh and exciting for enthusiasts exploring different styles of Gin Rummy.

Resources for Learning

Find official rules for Gin Rummy PDF guides online, offering detailed instructions and strategies. Websites like luudoo.com provide comprehensive downloadable resources for beginners and experts.

Recommended Books and Guides

For mastering Gin Rummy, several books and guides are highly recommended. “The Penguin Book of Card Games” by David Parlett offers a detailed overview of Rummy variations, including Gin Rummy. Another excellent resource is “Gin Rummy: A Comprehensive Guide” by Todd W. Neller, which provides strategies and rules for both beginners and advanced players. Additionally, “Winning Gin Rummy” by Frank Webster focuses on improving your gameplay with practical tips. These books are available in print and digital formats, including downloadable PDFs, making them accessible for learners. They cover everything from basic rules to advanced tactics, ensuring a well-rounded understanding of the game.

Online Tutorials and Practice Platforms

Enhance your Gin Rummy skills with online tutorials and practice platforms. Websites like CardGameHeaven and GinRummy.com offer step-by-step guides and interactive lessons. Platforms such as YouTube feature video tutorials, while CardGames.io provides free online games to practice. Apps like Gin Rummy Plus and RummyCircle allow you to play against AI or real opponents. These resources are ideal for mastering strategies, learning new tactics, and improving your gameplay. Many platforms also offer downloadable PDF guides and rulebooks, ensuring you have all the information you need to excel at Gin Rummy.

wow dungeon guide

Welcome to the world of World of Warcraft Dungeons! These challenging instanced zones are designed for groups of 5 players‚ offering epic loot‚ unique mechanics‚ and collaborative gameplay. Dungeons are a cornerstone of WoW’s endgame content‚ providing both gear progression and engaging story-driven experiences. Whether you’re new to the game or a seasoned veteran‚ understanding dungeons is essential for mastering WoW’s dynamic group play.

What Are Dungeons in World of Warcraft?

Dungeons in World of Warcraft are instanced zones designed for 5-player groups‚ offering challenging encounters‚ unique boss mechanics‚ and rewarding loot. These curated experiences combine storytelling‚ teamwork‚ and strategic gameplay‚ making them a core part of WoW’s endgame content. Each dungeon features diverse environments‚ memorable bosses‚ and opportunities to earn powerful gear‚ making them essential for character progression and group collaboration.

Why Dungeons Are Important for Progression

Dungeons are crucial for character progression‚ offering high-quality gear‚ experience‚ and skill improvement. They teach players how to handle boss mechanics‚ work as a team‚ and optimize their roles. Completing dungeons also unlocks access to higher-level content‚ making them a cornerstone of both gearing up and preparing for more challenging experiences like raids.

Roles in a Dungeon

In World of Warcraft‚ dungeons require players to fill specific roles: Tank‚ Healer‚ or DPS. These roles ensure balanced group dynamics‚ allowing teams to overcome challenges and defeat enemies effectively together.

Tank: Holding Aggro and Managing Threat

The Tank role is crucial in WoW dungeons‚ focusing on holding aggro and managing threat. Tanks use high-health abilities to maintain enemy focus‚ protecting squishier healers and DPS from damage. Effective use of taunts‚ cooldowns‚ and positioning ensures smooth group progression. Mastering threat management and aggro control is essential for a successful dungeon run.

Healer: Keeping the Group Alive

The Healer is vital to any dungeon group‚ focusing on keeping all members alive through healing spells. They must balance single-target and group heals‚ while managing their resources like mana or Holy Power. The healer’s priority is to sustain the tank‚ who bears the brunt of enemy attacks‚ ensuring they stay alive to control aggro. Effective healing is key to the group’s survival and success in challenging encounters.

DPS: Dealing Damage Effectively

DPS (Damage Per Second) players are responsible for dealing consistent damage to enemies‚ focusing on maximizing their damage output while managing aggro. They must use abilities effectively‚ optimize rotations‚ and avoid pulling threat from the tank. DPS roles require balancing cooldowns‚ resource management‚ and positioning to ensure peak performance without compromising the group’s stability. Coordination with the tank and healer is key to success in any dungeon encounter.

How to Access Dungeons

To access dungeons in World of Warcraft‚ open the Dungeon Finder Tool via the interface. Choose between specific dungeons or opt for a random one for convenience.

Using the Dungeon Finder Tool

The Dungeon Finder Tool simplifies accessing dungeons by allowing players to queue for specific or random dungeons. Open it via the interface‚ select your preferred role‚ and choose a dungeon. The tool matches players based on roles and preferences‚ making group formation efficient. It’s accessible once your character reaches the appropriate level for the content.

Choosing Specific Dungeons vs. Random

Choosing specific dungeons allows targeted progression and loot farming‚ while random dungeons offer variety and quicker queue times. Specific dungeons ensure familiarity with mechanics‚ aiding in smoother runs. Random selection broadens exposure to different content and rewards‚ making it ideal for casual play or exploring new zones. Balance both for optimal progression and enjoyment.

Preparing for a Dungeon

Preparing for a dungeon involves checking gear‚ researching mechanics‚ and forming a balanced group. Ensure your item level meets requirements and understand boss strategies for success.

Checking Gear and Item Level Requirements

Ensure your gear is optimized and meets the minimum item level for the dungeon. Use the Character Sheet to check your item level and the Dungeon Finder to confirm requirements. Review the Dungeon Journal for specific gear recommendations and mechanics. Upgrade your gear if necessary to avoid being undergeared for the challenge ahead.

Researching Dungeon Mechanics

Understanding dungeon mechanics is crucial for success. Use the in-game Dungeon Journal to learn boss abilities‚ trash patterns‚ and key strategies. Watch guides or videos to visualize complex encounters. Knowing mechanics ensures smoother runs‚ reduces wipes‚ and enhances your contribution to the group. Stay prepared to adapt and communicate strategies with your team for optimal performance.

Forming a Well-Rounded Group

A well-rounded group balances roles: a tank to absorb damage‚ a healer to restore health‚ and DPS to deal damage. Use the Dungeon Finder tool to recruit players with complementary skills. Assess gear and experience to ensure readiness. Clear communication is vital—use voice chat or text for coordination. Be adaptable to different playstyles and aim for a cohesive team effort to tackle challenges effectively. Preparation and teamwork lead to success in WoW dungeons.

Dungeon Strategies and Tips

Mastering dungeons requires understanding boss mechanics‚ optimizing cooldowns‚ and clear communication. Stay mobile‚ avoid unnecessary damage‚ and adapt strategies based on group strengths and weaknesses.

Understanding Boss Mechanics

Mastering boss mechanics is crucial for success in WoW dungeons. Learn attack patterns‚ weakness phases‚ and environmental hazards to anticipate and react. Positioning‚ cooldown usage‚ and avoiding avoidable damage are key. Understanding these elements ensures smoother‚ faster runs and minimizes wipes‚ allowing your team to progress efficiently through challenging encounters.

Communicating with Your Group

Communication is critical for successful dungeon runs. Clearly call out incoming adds‚ dangerous mechanics‚ and cooldown usage. Coordinate with your healer and tank to set a pace that works for everyone. Avoid unnecessary chatter and stay focused on the fight. Good communication ensures smoother execution of strategies and minimizes wipes‚ fostering a positive group atmosphere.

Managing Cooldowns and Resources

Effectively managing cooldowns and resources is vital for optimal performance. Tanks should use defensive cooldowns to mitigate heavy damage‚ while healers must balance mana usage with healing output. DPS players should coordinate damage cooldowns to maximize burst without overstepping threat limits. Proper resource management ensures sustained performance and prevents attrition‚ making dungeon runs smoother and more efficient for the entire group.

Common Mistakes to Avoid

Avoid ignoring boss mechanics‚ overpulling mobs‚ and poor communication. Neglecting group composition and failing to manage aggro can lead to wipes. Stay alert and coordinated!

Not Reading the Dungeon Journal

Neglecting the Dungeon Journal is a common mistake that can lead to wipes and confusion during dungeon runs. It offers crucial details on boss mechanics‚ key abilities‚ and optimal strategies. Without this knowledge‚ players may struggle with unexpected patterns‚ leading to poor performance and frustration for the entire group. Always take a few minutes to review the journal beforehand to ensure a smoother experience and avoid unnecessary challenges.

Ignoring Group Composition

Overlooking proper group composition is a critical error that can hinder dungeon progress. A balanced team requires a tank‚ healer‚ and DPS to manage aggro‚ sustain health‚ and deal damage effectively. Without this balance‚ the group may struggle with survivability‚ damage output‚ or threat management‚ leading to wipes and frustration. Always ensure a well-rounded team to tackle challenges efficiently and avoid unnecessary setbacks during runs.

Overpulling and Aggro Management

Overpulling‚ or pulling too many enemies at once‚ can overwhelm the group and lead to wipes. Proper aggro management is crucial‚ as it ensures the tank maintains threat while the healer and DPS avoid unnecessary damage. Mismanaging aggro can result in the healer or DPS being targeted‚ potentially leading to group wipes. Communicate with your team and use cooldowns wisely to maintain control and ensure smooth progression through the dungeon.

Dungeon Rewards and Loot

Dungeons reward players with valuable loot‚ including weapons‚ armor‚ and gear tailored to their class. Completing higher difficulty levels‚ such as Mythic+‚ yields greater rewards and exclusive items.

Types of Loot and Gear Drops

Dungeon loot includes weapons‚ armor‚ and accessories‚ with varying qualities like Common‚ Uncommon‚ Rare‚ Epic‚ and Legendary. Gear drops are class-specific‚ ensuring relevance to each player. Higher difficulty levels‚ such as Mythic+‚ yield better item levels and exclusive rewards‚ enhancing progression and character power significantly.

Championing Rewards for Mythic Dungeons

Completing Mythic dungeons rewards players with Keystone Achievements‚ exclusive gear‚ and increased item levels. Championing Rewards include unique transmog‚ pets‚ and high-level resources. These incentives encourage players to push higher Mythic+ levels‚ offering distinct rewards for exceptional performance and dedication to challenging content.

Advanced Dungeon Strategies

Advanced strategies involve optimizing DPS rotations‚ mastering tanking techniques‚ and perfecting healing cadences. These high-level tactics ensure efficiency and success in challenging Mythic+ and high-level dungeons.

Optimizing DPS Rotations

Optimizing DPS rotations involves mastering your class’s abilities‚ prioritizing high-damage skills‚ and maintaining uptime on key buffs. Use cooldowns strategically and adapt to encounter mechanics. Analyze logs to refine your performance and stay updated on class changes for maximum effectiveness in dungeons and raids.

Mastering Tanking Techniques

Mastering tanking techniques involves holding aggro‚ managing threat‚ and using cooldowns effectively. Position yourself to control enemy movements and protect your group. Maintain threat on multiple enemies while ensuring spatial awareness. Communicate with your team to coordinate pulls and adapt to unexpected situations‚ ensuring smooth progression through challenging encounters.

Perfecting Healing Cadences

Perfecting healing cadences requires mastering your rotation‚ managing cooldowns‚ and maintaining mana efficiency. Focus on prioritizing targets‚ especially the tank‚ while using area-of-effect spells for group healing. Adapt your strategy based on dungeon difficulty and enemy mechanics. Anticipate damage spikes and adjust your healing rhythm accordingly. Practice situational awareness to optimize your healing output and keep your group alive through challenging encounters.

Mastering WoW dungeons takes time and practice. Keep improving your skills‚ stay updated with guides‚ and enjoy new content for the best experience.

Final Tips for Success

Always prepare by researching mechanics and optimizing your gear. Communicate with your team to coordinate strategies and avoid mistakes. Stay adaptable and learn from wipes to improve. Use cooldowns wisely and focus on your role while supporting others. Keep a positive attitude and stay calm under pressure for a enjoyable and successful dungeon experience.

Resources for Further Learning

For deeper insights‚ explore official WoW guides‚ YouTube tutorials‚ and community forums. Websites like Icy Veins and WoWHead offer detailed strategies and class optimization tips. Additionally‚ the in-game Dungeon Journal provides boss mechanics and loot information. Engage with the WoW community on Reddit or Discord for real-time advice and group coordination opportunities.

dc personal property tax instructions

The DC Personal Property Tax Instructions guide individuals and businesses on filing Form FP-31, ensuring compliance with District regulations․ The form applies to all tangible personal property owned or held in trust in Washington, D․C․, with a filing deadline of July 31 annually․ Even if the property’s value is $225,000 or less, filing is mandatory․ These instructions provide detailed guidance on exemptions, depreciation, and payment methods, helping taxpayers navigate the process efficiently․

Overview of Personal Property Tax in Washington, D․C․

The DC Personal Property Tax applies to tangible personal property used for business activities within Washington, D․C․ This includes items like computers, furniture, and equipment․ Businesses and individuals owning or holding such property must file annually, even if the property’s value is $225,000 or less․ The tax supports local revenue and ensures compliance with district regulations․ Exemptions exist for certain entities, such as qualified 501(c)(3) organizations․ The Office of Tax and Revenue manages assessments and filings, with deadlines and depreciation guidelines outlined in official instructions․

Importance of Filing the FP-31 Form

Filing the FP-31 form is essential for compliance with DC tax regulations, ensuring accurate assessment of personal property used for business․ It enables the District to update records and verify exemptions․ Even if no tax is due, submission is mandatory․ Failure to file may result in penalties and interest․ The form helps businesses demonstrate eligibility for exemptions, such as those for 501(c)(3) organizations․ Timely filing avoids late fees and ensures smooth tax administration, maintaining good standing with the Office of Tax and Revenue․

Who Must File the DC Personal Property Tax Return

All individuals, corporations, partnerships, executors, administrators, guardians, receivers, and trustees owning or holding tangible personal property in Washington, D․C․, must file Form FP-31 annually by July 31․

Entities Required to File Form FP-31

All individuals, corporations, partnerships, executors, administrators, guardians, receivers, and trustees owning or holding tangible personal property in Washington, D․C․, must file Form FP-31․ This includes businesses operating in the District, regardless of size or structure․ Even if the property’s value is $225,000 or less, filing is mandatory․ The deadline for submission is July 31 annually․ Failure to comply may result in penalties and interest․ Proper documentation and accurate reporting are essential to ensure compliance with DC tax regulations․

Exemptions and Special Cases

Certain entities may be exempt from paying DC personal property tax, but specific conditions apply․ Property used for activities generating unrelated business income under IRC 511 is not exempt․ IRC 501(c)(3) organizations must file Form FR-164 to obtain exemption status․ Proper documentation and timely application are crucial for exemption eligibility․ Failure to comply may result in penalties․ Reviewing official DC tax guidelines is essential to understand exemptions and special cases fully․ Consulting these resources ensures compliance and avoids penalties for exemption eligibility․

Filing Requirements and Deadlines

The DC Personal Property Tax Return (FP-31) must be filed annually by July 31․ Even if no tax is due, filing is required․ Submit electronically via MyTax․DC․gov․

FP-31 Form: Key Components and Schedules

The FP-31 form includes essential sections such as property owner information, descriptions of assets, and assessment values․ It also contains schedules for different types of property, like Schedule A-1 for books and reference materials, Schedule A-2 for furniture and equipment, and Schedule C for disposed assets․ Proper completion of these sections ensures accurate reporting of personal property details, facilitating compliance with DC tax regulations․ Additionally, the form provides guidelines for depreciation calculations, aiding taxpayers in determining the correct taxable value of their assets․

Filing Frequency and Due Dates

The FP-31 form must be filed annually by all required entities in the District of Columbia․ The filing deadline is July 31 of each year, and the form reports property owned as of July 1․ Even if the property’s value is $225,000 or less, filing is mandatory․ Timely submission ensures compliance with DC tax regulations and avoids penalties․ Late filing may result in interest and penalties, so adhering to the deadline is crucial for all taxpayers, including individuals, businesses, and trusts holding tangible personal property in DC․

Electronic Filing Through MyTax․DC․gov

Electronic filing of Form FP-31 is mandatory and can be done securely through MyTax․DC․gov․ This platform offers a step-by-step guide, ensuring a smooth and efficient filing process․

Step-by-Step Guide to Online Filing

To file the FP-31 form online, create a MyTax․DC․gov account and log in․ Select the tax year and navigate to the Personal Property Tax section․ Enter property details, including type and value, and complete all required schedules․ Review calculations for accuracy․ Submit payment electronically or schedule a payment․ Verify all information before final submission․ Once filed, you’ll receive a confirmation․ Save or print this for records․ The process is secure and streamlined for efficiency, ensuring compliance with DC tax regulations․

Payment Options and Submission Confirmation

The District of Columbia offers multiple payment options for the FP-31 form, including electronic checks, credit cards, and payment vouchers․ Payments can be made securely through MyTax․DC․gov․ Once submitted, a confirmation page will display, which should be saved or printed for records․ The Office of Tax and Revenue (OTR) also accepts mailed payments with the FP-31P voucher․ Ensure all payments are made by the July 31 deadline to avoid penalties․ A confirmation ensures compliance and serves as proof of timely filing and payment․

Depreciation Guidelines for Personal Property

DC personal property tax requires depreciation of assets based on type and usage․ Furniture depreciates at 10% annually, while computers and equipment have varying rates up to 30%․ The remaining cost calculation ensures assets are not depreciated beyond 75% of their original value, with a minimum remaining cost of 25%․

Depreciation Rates for Different Asset Types

DC personal property tax depreciation rates vary by asset type․ Furniture, fixtures, and machinery depreciate at 10% annually․ Computers and related equipment, classified as Qualified Technological Equipment, depreciate at 30%, with a minimum remaining cost of 10%․ Other computers and peripherals depreciate at 20%․ Most assets cannot be depreciated beyond 75% of their original cost, ensuring a minimum remaining cost of 25%․ These rates apply to tangible personal property used in business activities, ensuring accurate valuation for tax purposes․

Maximum Depreciation Limits and Remaining Cost Calculation

DC personal property tax rules set maximum depreciation limits to prevent over-depreciation․ Most assets cannot be depreciated beyond 75% of their original cost, ensuring a minimum remaining cost of 25%․ For Qualified Technological Equipment, depreciation is capped at 90%, with a minimum remaining cost of 10%․ These limits apply to all tangible personal property, ensuring accurate tax valuation․ The remaining cost is calculated by subtracting accumulated depreciation from the original purchase price, ensuring compliance with DC tax regulations․

Penalties, Interest, and Compliance

Failure to file or pay on time results in penalties and interest․ Late filing penalties include a $250 fee, 5% monthly penalties, and interest on unpaid taxes․ Compliance is crucial to avoid these additional costs․

Consequences of Late Filing or Non-Filing

Late filing or non-filing of the DC Personal Property Tax Return (Form FP-31) results in penalties and interest․ A $250 penalty applies for late filing, with additional 5% monthly penalties on unpaid taxes․ Interest accrues on the unpaid tax balance, starting from the original due date․ If no tax is due, a $250 penalty still applies for failing to file․ Chronic non-compliance may lead to further enforcement actions․ Timely filing and payment are essential to avoid these financial consequences and maintain compliance with DC tax regulations․

Understanding Penalties and Interest Calculations

Penalties and interest for late filing or non-payment of DC Personal Property Tax are calculated based on the unpaid tax balance․ A $250 penalty applies for late filing, and an additional 5% penalty is imposed monthly on unpaid taxes․ Interest accrues on the outstanding balance starting from the original due date․ If no tax is due but the return is not filed, a $250 penalty still applies․ Understanding these calculations helps taxpayers avoid financial consequences and ensure timely compliance with DC tax obligations․

Helpful Resources and References

Official DC tax guidelines, Form FP-31 instructions, and MyTax․DC․gov portal provide comprehensive resources for filing personal property tax returns accurately and efficiently․

Official DC Tax Office Guidelines and Forms

The District of Columbia Office of Tax and Revenue provides official guidelines and forms for personal property tax filings․ Form FP-31, the Personal Property Tax Return, is the primary document required․ Detailed instructions, exemptions, and due dates are outlined in the official DC tax office materials․ Resources include user guides, depreciation tables, and filing checklists․ These materials are available on the MyTax․DC․gov portal, ensuring easy access for taxpayers․ Additional tools, such as Excel templates for tracking property, are also offered to facilitate accurate submissions․

Additional Tools and Templates for Filing

The DC Office of Tax and Revenue offers additional tools to simplify the filing process․ An Excel spreadsheet template is available to track personal property, such as computers, furniture, and equipment․ Depreciation guidelines and tables are provided to help calculate remaining costs accurately․ Schedules like A-1, A-2, C, and D-1/D-2 assist in categorizing assets․ User guides and checklists ensure compliance with filing requirements․ These resources, accessible via MyTax․DC․gov, support accurate and efficient submissions, making the process smoother for filers․

haier washer and dryer manual

Welcome to the Haier Washer and Dryer Manual. This guide provides essential information for safe operation, feature exploration, and troubleshooting. Refer to your model number for specific instructions to ensure optimal performance.

1.1 Overview of Haier Washer and Dryer Models

Haier offers a range of washer and dryer models designed for efficiency and convenience. The I-Pro Series, including HWD80-B14979 and HWD100-B14979, features front-loading designs with capacities up to 10kg for washing and 6kg for drying. These models combine advanced settings, eco-friendly options, and user-friendly controls, catering to diverse household needs.

1.2 Importance of Reading the Manual

Reading the Haier washer and dryer manual is crucial for safe and efficient appliance operation. It provides detailed instructions on installation, usage, and troubleshooting, ensuring optimal performance. The manual also highlights safety precautions, warranty details, and maintenance tips, helping users avoid common issues and extend the product’s lifespan. Regular reference ensures proper care and functionality.

Safety Information

Ensure safe operation by following guidelines to prevent accidents. Avoid flammable materials, proper installation, and regular maintenance are key to avoiding hazards and ensuring longevity.

2.1 Pre-Use Safety Checks

Before first use, ensure all transport bolts are removed and check for damage. Verify the appliance is level and properly installed. Remove packaging and keep out of children’s reach. Ensure all connections are secure and comply with technical specifications to guarantee safe and efficient operation.

2.2 Daily Use Warnings

Avoid washing items contaminated with flammable substances like oil or petrol. Do not open the detergent drawer during cycles or touch the hot door. Ensure proper ventilation and keep children away. Never insert or remove the plug near flammable gases. Follow these guidelines to ensure safe and efficient daily operation of your Haier washer and dryer.

2.3 Installation Safety Guidelines

Ensure the appliance is installed on a stable, level surface and avoid placing it behind lockable or sliding doors. Remove all transport bolts and packaging materials. Keep the area clear of flammable materials during installation. Always follow the manufacturer’s instructions for proper water and power connections to ensure safety and functionality.

Product Description and Features

The Haier washer and dryer combine advanced technology with user-friendly design, offering features like multiple wash programs, energy efficiency, and a durable stainless steel drum for reliable performance.

3.1 Key Components of the Washer and Dryer

The Haier washer and dryer feature a stainless steel drum for durability, a control panel with intuitive buttons, a detergent drawer for easy detergent addition, and a pump filter to ensure efficient water drainage. These components work together to provide reliable performance and maintain optimal functionality during washing and drying cycles. Regular maintenance of these parts is essential for longevity.

3.2 Special Features and Settings

Haier washer and dryer offer advanced features such as Smart Wash and Dry, Express 15 for quick cycles, and Eco 40-60 for energy efficiency. Settings include Stain Removal for tough spots and Dry Level customization. These features ensure versatile and efficient laundry care, catering to various fabric types and user preferences for optimal cleaning and drying results.

Control Panel and Programmes

The control panel offers intuitive navigation with buttons for temperature, spin speed, and stain removal. Various programmes cater to different fabrics, ensuring customized care for your laundry needs.

4.1 Understanding the Control Panel Layout

The control panel features a user-friendly design with function buttons for temperature, spin speed, and stain removal. The start/pause button initiates or interrupts cycles. LEDs indicate active settings, and the panel includes a delay option for scheduled washes. Refer to your manual for model-specific layouts and functionality details.

4.2 Available Wash and Dry Programmes

Haier offers various wash and dry programmes, including Cotton, Synthetics, Wool, and Express 15 for quick cycles. The dryer features settings like Dry Level and temperature control. Smart programmes such as Smart Wash and Dry, Babycare, and Eco modes provide tailored care. Customizable options include delay start and eco-friendly settings, optimizing convenience and efficiency.

4.3 Customizing Settings

Personalize your wash and dry cycles with Haier’s customizable settings. Adjust temperature, spin speed, and drying levels to suit fabric types. Use the Stain Removal feature for tough spots and enable Extra Rinse for sensitive items. Customization ensures optimal care for your laundry while saving energy and water, enhancing efficiency and fabric longevity.

Daily Use and Maintenance

Regular maintenance ensures efficient performance. Check water connections for leaks and clean the detergent drawer after each use. Properly adding detergent and fabric softener optimizes wash results. Always refer to your Haier manual for specific care instructions to prolong appliance life.

5.1 Power and Water Connections

Connect your Haier washer and dryer to a stable 220V-240V/50Hz power supply and ensure secure water inlet connections. Check for leaks and tighten all joints. Use the provided hoses to avoid compatibility issues. Regularly inspect connections to prevent water damage or electrical hazards, ensuring safe and efficient operation as outlined in your Haier manual.

5.2 Adding Detergent and Fabric Softener

Slide out the detergent drawer and add the recommended amount of machine-approved detergent. Place fabric softener in the designated compartment. Avoid overuse to prevent residue buildup. Follow the detergent manufacturer’s guidelines for optimal performance. Regularly clean the drawer to maintain hygiene and efficiency, as detailed in your Haier manual.

5;3 Starting and Interrupting Wash Programmes

To start a wash programme, press the Start/Pause button. The LED will stop flashing and stay lit. To interrupt, press the same button gently. The programme will pause, allowing you to make changes or cancel it. Always refer to your Haier manual for specific guidance on programme management.

5.4 Eco-Friendly Washing Tips

For eco-friendly washing, use the Eco 40-60 programme. Select the maximum load size to optimize energy and water use. Choose exact detergent dosages and opt for lower temperatures. This reduces consumption and minimizes environmental impact, ensuring efficient and responsible washing.

Care and Cleaning

Regular cleaning of the detergent drawer and pump filter is essential for maintaining efficiency. After long disuse, ensure the door remains open to prevent moisture buildup.

6.1 Cleaning the Detergent Drawer

Regularly clean the detergent drawer to remove residue. Pull it out, rinse with water, and ensure it’s dry before reinstalling. This prevents clogs and maintains efficiency. Always follow the manufacturer’s instructions for optimal performance.

6.2 Maintaining the Pump Filter

Regularly clean the pump filter to ensure proper drainage. Locate it at the bottom of the machine, remove debris, and rinse with water. Replace it securely to prevent leaks. This maintains performance and prevents clogs. Follow the manual’s guidelines for troubleshooting and long-term care.

6.3 Preparing for Long Periods of Disuse

For extended inactivity, disconnect the power and water supply. Leave the door open to prevent moisture buildup and odors. Drain hoses and ensure the pump filter is clean. This protects the machine from damage and ensures optimal performance when you resume use. Always follow manual guidelines for maintenance and storage.

Troubleshooting Common Issues

This section helps identify and resolve common problems with your Haier washer and dryer. From error codes to operational issues, find practical solutions to ensure smooth functioning.

7.1 Identifying Common Problems

Common issues with Haier washer and dryer include strong vibrations, power failures, and error codes like “FD.” Check for loose transportation bolts, uneven installation, or clogged filters. Ensure proper detergent usage and verify connections. Regular maintenance, like cleaning the pump filter, can prevent many issues. Always refer to the manual for specific troubleshooting steps.

7.2 Solving Issues Like Strong Vibration or No Power

Address strong vibrations by ensuring the machine is levelled and all transport bolts are removed. For no power issues, check the electrical connections and circuit breaker. Restart the appliance after resolving. If problems persist, consult the troubleshooting section or contact Haier Support for assistance. Always ensure safety before attempting repairs.

7.3 Handling Error Codes

If your Haier washer/dryer displays an error code, refer to the manual for specific explanations. Codes like “Heating error” or “Motor error” indicate serious issues requiring professional assistance. For “FH” (water inlet problems), check the water supply. Always restart the appliance after resolving the issue. Consult the troubleshooting guide or contact Haier Support for further help.

Installation and Technical Data

This section covers essential installation steps and technical specifications for your Haier washer and dryer. Proper setup ensures optimal performance and safety. Always follow the manual guidelines.

8.1 Step-by-Step Installation Guide

Ensure the area is clear and level. Remove packaging and transport bolts. Connect water inlet hoses securely, ensuring no leaks. Fix the drain hose at 80-100 cm height. Plug in the power supply and test all connections. Follow manual instructions precisely to avoid damage and ensure safe operation of your Haier washer and dryer.

8.2 Technical Specifications

Haier washer and dryer models offer capacities ranging from 8-12 kg for washing and 5-8 kg for drying. They feature stainless steel drums, variable spin speeds, and multiple wash programs. Power requirements are 220V-240V/50Hz; Energy consumption varies by model and program. Check your specific model’s manual for exact technical details to ensure compatibility and optimal performance.

8.3 Water and Power Requirements

Ensure a stable 220V-240V/50Hz power supply. Connect to a grounded outlet to avoid electrical hazards. Water supply must be clean and filtered, with a pressure of 0.3-8 bar. Proper drainage requires a hose elevation of 80-100 cm above the machine base. Always use the provided hoses to prevent leaks and ensure safe operation. Regularly inspect connections for wear.

Customer Service and Support

Haier offers comprehensive support through online resources and direct assistance. Visit the official website for model-specific manuals, troubleshooting guides, and contact information. For unresolved issues, reach out to Haier’s customer service team for professional help.

9.1 Contacting Haier Support

To contact Haier support, visit their official website and navigate to the contact section. Use the provided phone numbers or email addresses for assistance. Ensure you have your appliance’s model number ready for efficient support. Additionally, find model-specific manuals and troubleshooting guides on their online portal. This service is available to address any concerns promptly.

9.2 Finding Model-Specific Manuals Online

To find your model-specific manual, visit Haier’s official website and search using your appliance’s model number. Manuals are available for download in PDF format, covering installation, operation, and troubleshooting. Ensure you have your model number ready for accurate results. This resource provides detailed guidance for optimal use and maintenance of your Haier washer and dryer.

Error Codes and Solutions

This section explains common error codes and provides step-by-step solutions. Refer to your Haier manual for specific codes and DIY fixes to resolve issues quickly.

10.1 Common Error Codes Explained

Error codes like FD or E03 indicate specific issues, such as heating element malfunctions or sensor errors. These codes help identify problems quickly, guiding you to solutions like checking connections or contacting support. Always consult your Haier manual for precise code meanings and troubleshooting steps to resolve issues efficiently.

10.2 DIY Solutions for Common Issues

For issues like strong vibrations, ensure all transport bolts are removed and the machine is levelled. Check pump filters regularly and clean them. If error codes appear, restart the machine or check water connections. For drying issues, ensure the venting system is clear. Always refer to your manual for model-specific DIY solutions to maintain efficiency and prevent damage.

Regular maintenance and proper usage ensure optimal performance of your Haier washer and dryer; Always refer to your manual for model-specific guidance. Clean filters, check connections, and use recommended detergents. For troubleshooting, restart the machine or check error codes. Keep the appliance levelled and well-ventilated. Happy washing!

the grapes of wrath book pdf

The Grapes of Wrath, a 1939 novel by John Steinbeck, explores the Great Depression’s impact on the Joad family, symbolizing resilience and social change in America through their journey from Oklahoma to California.

1.1. Background

The Grapes of Wrath, written by John Steinbeck and published in 1939, is set against the backdrop of the Great Depression and the Dust Bowl. Steinbeck was inspired by the real-life struggles of migrant workers and the social injustices they faced. The novel follows the Joad family as they journey from Oklahoma to California, seeking a better life. Its exploration of poverty, resilience, and collective action resonated deeply with readers, making it a timeless classic. Today, the book remains widely read and studied, with its themes continuing to evoke empathy and reflection. The PDF version ensures easy access for modern readers.

1.2. Historical Context

The Grapes of Wrath is deeply rooted in the historical turmoil of the 1930s, particularly the Great Depression and the Dust Bowl. The novel vividly portrays the economic devastation and environmental disaster that ravaged Oklahoma, forcing families like the Joads to migrate to California in search of work and hope. Steinbeck’s depiction of migrant laborers’ struggles reflects the real-life hardships faced by thousands during this period. The Dust Bowl’s catastrophic impact and the exploitation of workers in California’s agricultural fields provide the historical backdrop for the Joads’ journey, highlighting themes of resilience and collective action in the face of systemic oppression.

1.3. Steinbeck’s Intentions

John Steinbeck wrote The Grapes of Wrath to expose the harsh realities faced by migrant workers during the Great Depression. He aimed to highlight the exploitation of laborers and the deep social inequalities of the time. Steinbeck’s intention was not only to narrate the Joads’ story but also to advocate for collective action and unionization as a means of challenging oppressive systems. By focusing on the Joad family’s resilience and unity, Steinbeck aimed to inspire empathy and provoke societal change, encouraging readers to reflect on the moral and ethical implications of economic injustice.

Plot Summary

The Grapes of Wrath follows the Joad family, forced from their Oklahoma farm during the Dust Bowl, as they journey to California in search of work and hope, enduring hardship and discovering resilience along the way.

2.1. Setting

The Grapes of Wrath is set during the Great Depression, primarily in Oklahoma and California. The novel begins in the Dust Bowl-ravaged Oklahoma, where drought and economic collapse devastate tenant farmers like the Joads. The harsh, barren landscape reflects their desperation and loss of livelihood. The Joads embark on a journey along Route 66, a symbol of hope and migration, seeking a better life in California. However, the promised land proves disillusioning, as they encounter exploitation and poverty in the migrant camps. Steinbeck vividly contrasts the Oklahoma plains with the fertile but unforgiving fields of California, highlighting the struggle between nature and human resilience.

2.2. Key Events

The Grapes of Wrath unfolds through pivotal events that shape the Joad family’s journey. The novel begins with the Joads’ forced departure from their Oklahoma farm due to the Dust Bowl and economic hardship. Upon arriving in California, they face exploitation and harsh living conditions in migrant camps. Key events include Grampa Joad’s death, Tom Joad’s involvement with labor organizer Jim Casy, and Casy’s eventual murder. Tom’s decision to leave the family to continue Casy’s fight for workers’ rights marks a turning point. The novel concludes with Rose of Sharon’s symbolic act of nurturing a starving man, embodying resilience and hope amidst despair.

Major Themes

Poverty and social injustice dominate the novel, highlighting the struggles of migrant workers. Family and resilience are central, as the Joads endure hardship together. Collective action emerges as a powerful response to exploitation.

3.1. Poverty and Social Injustice

Poverty and social injustice are central themes in The Grapes of Wrath. The Joad family, like many others, faces economic ruin due to the Dust Bowl and exploitative banking practices. Forced to migrate, they encounter harsh working conditions and meager wages in California. Steinbeck vividly portrays the dehumanizing effects of poverty, emphasizing the struggle for basic dignity and survival. The novel criticizes capitalism’s exploitation of the working class, highlighting systemic inequalities that perpetuate suffering. Through the Joads’ journey, Steinbeck underscores the resilience of the poor and the need for collective action to challenge oppressive systems.

3.2. Family and Resilience

Family and resilience are at the heart of The Grapes of Wrath. The Joads, bound by love and determination, face unimaginable hardships together. Ma Joad, the moral backbone, embodies strength and unity, while Tom evolves from a self-centered individual to a champion of collective action. Despite losing their farm, livelihood, and even family members, the Joads persevere, relying on their bonds to survive. Their journey symbolizes the enduring power of family and the human spirit’s ability to adapt and endure in the face of overwhelming adversity, offering hope amid despair and displacement.

3.3. Collective Action

Collective action emerges as a powerful theme in The Grapes of Wrath, highlighting the importance of unity among the working class. The novel portrays the Joads and other migrant workers realizing that individual struggles are ineffe

Character Analysis

The Grapes of Wrath delves into the Joad family, portraying their strength and resilience. Tom Joad embodies courage and moral leadership, while Ma Joad symbolizes maternal strength and unity.

4.1. Tom Joad

Tom Joad, the eldest son of the Joad family, is a central character in The Grapes of Wrath. Released from prison after serving time for manslaughter, Tom returns home to find his family displaced. His journey reflects moral growth and a deepening understanding of social injustice. Influenced by Jim Casy, Tom evolves from a self-focused individual to a leader advocating for collective action. His departure from the family to fight for workers’ rights symbolizes his commitment to the greater cause. Tom’s transformation embodies the novel’s themes of resilience and the struggle for a fair society. His legacy endures as a symbol of hope and resistance.

4.2. Ma Joad

Ma Joad, the matriarch of the Joad family, embodies resilience and maternal care. She is the emotional and moral center, holding the family together during their arduous journey. Ma Joad’s unwavering spirit and resourcefulness inspire hope amidst despair. Her determination to keep the family united and fed reflects her deep love and strength. Ma Joad’s character symbolizes the enduring power of women in times of crisis, as she navigates the challenges of poverty and displacement with unyielding resolve. Her presence is a testament to the human spirit’s ability to persevere against overwhelming adversity. Ma Joad’s strength is a beacon of hope for her family.

4.3. Other Key Characters

Jim Casy, a former preacher, evolves into a union organizer, symbolizing collective action. Rose of Sharon, pregnant and resilient, embodies hope despite her losses. Grampa Joad, stubborn and traditional, dies early, representing the end of an era. Uncle John, haunted by guilt, struggles with depression. Noah and Al Joad, though less prominent, contribute to the family’s dynamics. Connie Rivers, Rose’s husband, abandons the family, highlighting vulnerability. Muley Graves, a neighbor, stays behind, illustrating displacement’s impact. The Wilsons, especially Sairy, show kindness and shared struggle. These characters enrich the novel’s tapestry, exploring themes of loss, hope, and unity.

Literary Devices

Steinbeck employs symbolism and metaphors, such as the Joads’ journey symbolizing hope and resilience, and the Dust Bowl representing environmental and economic devastation. Intercalary chapters highlight collective struggle.

5.1. Symbolism

The Grapes of Wrath is rich in symbolism, with the Dust Bowl representing environmental and economic devastation. Route 66 symbolizes hope and migration, while the Joads’ journey embodies resilience and collective struggle; The turtle crossing the road mirrors the working class’s slow, determined progress. The land itself symbolizes loss and longing, contrasting Oklahoma’s barrenness with California’s unfulfilled promises. Steinbeck uses these symbols to explore themes of hardship, unity, and the enduring spirit of the common people, creating a powerful narrative that resonates deeply with the human experience during the Great Depression.

5.2. Metaphors

Steinbeck employs metaphors to convey the struggles and hopes of the Joads. The Dust Bowl is likened to a “monster” consuming the land, while the Joads’ journey is a metaphor for the universal quest for dignity and survival. The shattered dreams of California are mirrored in the broken promises of the flyers advertising work. Ma Joad’s strength is a metaphor for maternal resilience, and Tom’s transformation symbolizes the awakening of social consciousness. These metaphors deepen the novel’s emotional and political impact, making it a timeless exploration of human struggle and collective resistance.

Reception and Impact

The Grapes of Wrath received widespread acclaim, winning the Pulitzer Prize in 1940 and contributing to Steinbeck’s Nobel Prize in 1962. Its vivid portrayal of the Great Depression sparked controversy but remains a powerful symbol of social justice and resilience.

6.1. Critical Reception

The Grapes of Wrath was met with both acclaim and controversy upon its release. Critics praised its vivid portrayal of the Great Depression and the struggles of migrant workers, while others criticized its explicit language and political undertones. The novel won the Pulitzer Prize in 1940, solidifying its place in American literary history. Steinbeck’s ability to blend powerful storytelling with social commentary earned him widespread recognition. Despite initial backlash, the novel is now celebrated as a masterpiece of 20th-century literature, continuing to resonate with readers for its exploration of poverty, injustice, and the resilience of the human spirit.

6.2. Cultural Impact

The Grapes of Wrath has left an indelible mark on American culture. Its powerful depiction of the Great Depression and the Dust Bowl resonated deeply with the public, shedding light on the plight of migrant workers. The novel inspired a 1940 film adaptation directed by John Ford, further amplifying its reach. Steinbeck’s work also influenced labor reforms and public awareness of social inequalities. Today, it remains a cultural touchstone, frequently referenced in media and education, symbolizing the enduring struggle for justice and the strength of the human spirit in the face of adversity. Its legacy continues to inspire new generations.

6.3. Awards and Recognition

The Grapes of Wrath earned John Steinbeck the National Book Award in 1939 and the Pulitzer Prize for Fiction in 1940. These accolades highlighted its literary significance and social impact. The novel was also a key factor in Steinbeck’s Nobel Prize in Literature in 1962, recognizing his contribution to American literature. Its critical acclaim and enduring popularity solidified its place as a classic of 20th-century literature, continuing to inspire adaptations and scholarly analysis. The awards underscored the novel’s profound influence on both literature and society.

PDF and Digital Versions

The Grapes of Wrath is widely available in PDF and digital formats on platforms like Amazon, Google Books, and e-bookstores. These versions offer convenience for readers.

7.1. Availability

The PDF version of The Grapes of Wrath is widely accessible online through various platforms. Readers can download or purchase digital copies from major e-bookstores like Amazon Kindle, Google Books, and Apple Books. Additionally, many libraries offer free access to the novel through services like OverDrive. Free PDF versions are also available on some websites, though users should ensure they are downloading from legal and reputable sources. The digital format allows for easy access and portability, making the classic novel more convenient for modern readers. Its availability in PDF ensures its timeless story remains accessible to a broad audience.

7.2. Study Guides

Study guides for The Grapes of Wrath are widely available online, offering in-depth analyses of the novel. Platforms like CliffsNotes, SuperSummary, and LitCharts provide detailed chapter summaries, theme breakdowns, and character analyses. These resources are invaluable for students and readers seeking to understand the novels complex themes, such as poverty, resilience, and collective action. Many guides also include essay topics, quotes, and historical context, making them essential tools for academic success. Additionally, sites like GradeSaver offer comprehensive study materials to aid in analyzing Steinbecks masterpiece effectively.

fatal attraction tv show episode guide

The Fatal Attraction TV series is a gripping anthology thriller that reimagines the iconic 1987 film for modern audiences. Each season explores intense, dangerous affairs and their deadly consequences, blending psychological drama with true crime storytelling.

Episode Guide

The Fatal Attraction series features a comprehensive episode guide, detailing titles, airdates, and synopses. With over 15 seasons, including Season 1’s 8 episodes and Season 15’s gripping stories like “Death in the Cul-de-Sac” and “Evil Escapes,” the guide helps fans track every intense narrative.

Season 1 Episode Guide

Season 1 of Fatal Attraction consists of 8 episodes, each diving into the complexities of dangerous relationships and their lethal outcomes. The season premieres with the Pilot, introducing viewers to the series’ dark, suspenseful tone. Episode 2, The Movie in Your Mind, explores the blurred lines between reality and fantasy. The Watchful Heart (Episode 3) delves into themes of obsession and control, while Beautiful Mosaics (Episode 4) uncovers the cracks in seemingly perfect relationships. Medial Woman (Episode 5) examines the consequences of betrayal, and The Dillingers (Episode 6) presents a chilling tale of deceit. Best Friends (Episode 7) highlights the deadly cost of jealousy, and the season concludes with Caregiving (Episode 8), a poignant yet thrilling finale. Each episode weaves intricate narratives, keeping viewers on the edge of their seats. This season sets the foundation for the series’ exploration of fatal attractions and their devastating repercussions.

Season 15 Episode Guide

Season 15 of Fatal Attraction continues the series’ tradition of delivering intense, true crime-inspired episodes. The season features 50 gripping episodes, each exploring a unique tale of relationships turned deadly. Episode 1, Death in the Cul-de-Sac, unravels a mysterious neighborhood murder, while Unearthed Secrets (Episode 2) exposes hidden truths behind a seemingly perfect marriage. The Devil Inside Me (Episode 3) delves into psychological manipulation, and Sinful Betrayal (Episode 4) showcases the consequences of infidelity. Lovers Quarrel (Episode 5) highlights the dangers of passion turning deadly, and Into Thin Air (Episode 6) follows a disappearance that shocks a small town. The season’s final episode, Evil Escapes (Episode 50), leaves viewers on the edge of their seats with a chilling escape and unresolved justice. Each episode in Season 15 masterfully blends suspense, drama, and real-life inspiration, solidifying Fatal Attraction as a must-watch for true crime enthusiasts.

Notable Episodes from Other Seasons

Fatal Attraction has delivered countless compelling episodes across its seasons, with several standing out for their intense storytelling. From Season 1, Pilot sets the tone, introducing the series’ dark themes, while The Movie in Your Mind (1-2) explores the blurred lines between reality and obsession; Season 14’s A Cryptic Call (14-1) and A Violent Vendetta (14-3) showcase the show’s ability to blend suspense with real-life inspiration. Another highlight is When the Smoke Clears (5-4), which delves into a tragic love triangle ending in murder. These episodes exemplify the series’ knack for crafting narratives that keep viewers hooked and emotionally invested. Each season brings fresh stories of betrayal, desire, and deadly consequences, ensuring Fatal Attraction remains a gripping watch for true crime fans and drama enthusiasts alike.

Behind-the-Scenes

The Fatal Attraction series offers a deep dive into its production, showcasing the crew’s meticulous attention to detail and the cast’s immersive performances; The reimagining of the 1987 film involved a talented production team and innovative storytelling techniques.

Production Details and Crew Insights

The Fatal Attraction TV series is a Paramount original production, developed by Alexandra Cunningham and Kevin J. Hynes. The show reimagines the 1987 film, offering a fresh perspective on the iconic story. Filming began in October 2020, with Silver Tree directing several episodes. The series features a blend of psychological thriller and drama, with a focus on character development and suspenseful storytelling.

The production team includes renowned names like Joshua Jackson and Lizzy Caplan, who star as Dan Gallagher and Alex Forrest, respectively. The crew emphasizes attention to detail, ensuring the series captures the intensity of the original film while appealing to modern audiences. The show’s eight-episode structure allows for deep exploration of themes like obsession and betrayal.

The series premiered on Paramount+ in 2023, with the first two episodes released simultaneously. Despite mixed reviews, the show gained attention for its bold take on the classic narrative. The production process involved extensive research and creative liberties to adapt the story for a contemporary audience.

Cast and Characters Development

The Fatal Attraction TV series boasts a talented cast, with Joshua Jackson and Lizzy Caplan starring as Dan Gallagher and Alex Forrest, respectively. Their performances bring depth to the complex characters, exploring themes of obsession, betrayal, and consequence. The show also features a strong supporting cast, including actors who portray characters entangled in the deadly affairs that define each episode.

The series is structured as an anthology, with each season focusing on a new set of characters and stories. This allows for fresh perspectives and dynamic character development, while maintaining the core themes of the original narrative. The cast’s ability to portray relatable yet flawed individuals adds layers to the storytelling, making the series both engaging and thought-provoking.

The chemistry between the leads is a highlight, as their characters’ relationship evolves from passion to destruction. The cast’s performances are central to the show’s success, bringing authenticity to the gripping and often chilling plotlines.

Music and Cinematography

The Fatal Attraction TV series captivates audiences with its masterful use of music and cinematography, which amplify the tension and emotional depth of its gripping narrative. The score, often a blend of orchestral and ambient sounds, heightens the psychological suspense, drawing viewers deeper into the characters’ unraveling lives.

The cinematography is equally impressive, employing bold lighting and framing to emphasize the claustrophobic nature of the characters’ relationships. Close-ups and long shots are used strategically to convey the intensity of their emotions, while the color palette shifts to reflect the darker turns in the story.

These visual and auditory elements work seamlessly together to create an immersive experience, making the series a standout in its genre. The attention to detail in both music and cinematography ensures that each episode feels like a cinematic endeavor, enhancing the overall impact of the show’s thrilling and often chilling storytelling.

Reception and Reviews

Fatal Attraction has received mixed reviews, with critics praising its intense storytelling but criticizing its pacing. While some applaud its modern take on the classic thriller, others find it lacking compared to the original film. Audiences remain divided, yet engaged.

Critical Response and Ratings

The Fatal Attraction TV series has garnered a mixed critical response, with many praising its intense storytelling while others find it lacking compared to the original 1987 film. On review aggregator sites, the series holds a Metascore of 47, indicating “mixed or average” reviews. Critics have highlighted the strong performances of Joshua Jackson and Lizzy Caplan, who bring depth to their complex characters. However, some have criticized the pacing, calling it uneven and drawn-out. The show’s modern twist on the classic thriller has been commendable, but it struggles to maintain the suspense that made the film iconic. Despite this, the series has maintained a loyal audience, particularly among fans of true crime and psychological dramas. Its ability to balance personal drama with gripping plotlines has kept viewers engaged. While not universally acclaimed, Fatal Attraction remains a compelling watch for those drawn to dark, Relationship-driven stories. The series continues to spark debates about its narrative choices and faithfulness to the source material.

Audience Feedback and Popularity

The Fatal Attraction TV series has built a dedicated fanbase, particularly among true crime enthusiasts and those drawn to psychological thrillers. Viewers praise the show’s ability to blend suspense with deep character exploration, making it a binge-worthy experience. Many appreciate the modern twist on the classic story, which delves into the complexities of relationships and the consequences of obsession. Fans have expressed admiration for the performances of Joshua Jackson and Lizzy Caplan, who bring nuance to their roles. However, some viewers feel the pacing can be uneven, and the series occasionally struggles to maintain the tension that defined the original film. Despite this, Fatal Attraction remains popular, with fans actively discussing each episode’s twists and turns on social media. The show’s loyal audience continues to grow, particularly among younger viewers who appreciate its contemporary take on the timeless thriller genre. Its success has also led to discussions about potential future seasons, keeping fans eagerly anticipating more.

Cultural Impact

The Fatal Attraction TV series has left a significant mark on popular culture, reigniting interest in the classic 1987 film while introducing the story to a new generation. Its modern take on themes like obsession, power dynamics, and the consequences of illicit relationships has sparked widespread discussions across social media and entertainment platforms. The series has also influenced the way thrillers are reimagined for contemporary audiences, proving that classic stories can be revitalized with fresh perspectives. Its success has encouraged other networks to explore similar reboots, shaping the current landscape of television drama. Additionally, the show’s exploration of complex characters and morally ambiguous situations has resonated with viewers, fostering debates about accountability and empathy in modern relationships. By blending psychological depth with gripping storytelling, Fatal Attraction has cemented its place as a cultural touchstone, continuing to inspire conversations long after each episode ends.

Where to Watch Fatal Attraction

Fans of the Fatal Attraction TV series can stream all episodes on Paramount+, where the show originally premiered. The platform offers both season 1 and subsequent seasons, allowing viewers to binge-watch or revisit their favorite episodes. Additionally, select episodes are available on TV One, which airs the series as part of its true crime programming lineup. For those who prefer purchasing individual episodes or seasons, platforms like Amazon Prime Video, Google Play, and iTunes also offer the series for download. International viewers can check local streaming services or cable networks for availability. Notably, the documentary series Fatal Attractions (2010-2013), which aired on Animal Planet, is unrelated to the drama series but can be found on various streaming platforms for fans of true crime documentaries. With multiple options available, audiences can easily access and enjoy the gripping stories of Fatal Attraction from the comfort of their homes.